Posted on 629 Comments

Sew Mama, Sew Giveaway Day!

Today is the day! If you have never taken part in Sew Mama, Sew’s Giveaway Day before, you are in for a treat. Tons of bloggers will be posting giveaways today, in the spirit of friendship and kindness. You should totally check out all the offerings, but I assume you would like to see what I am offering before you do!

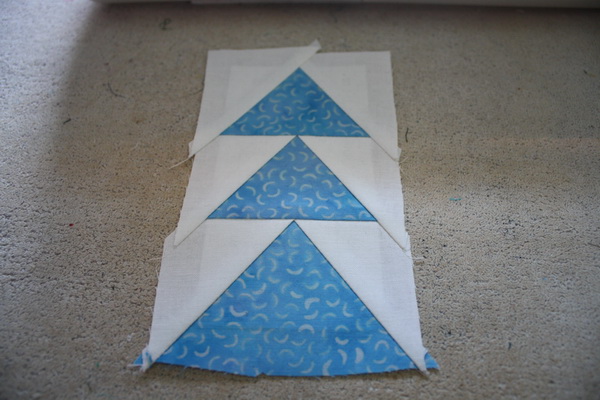
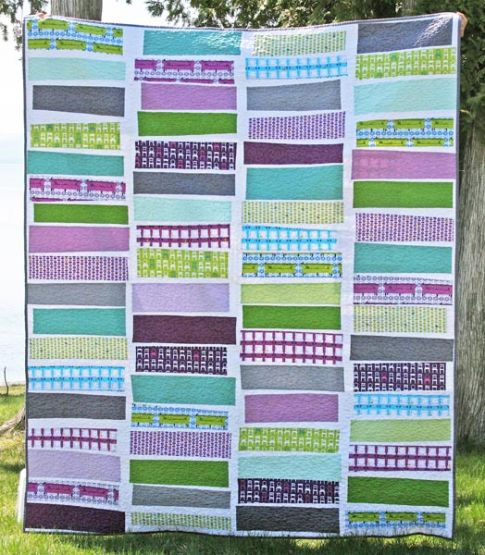
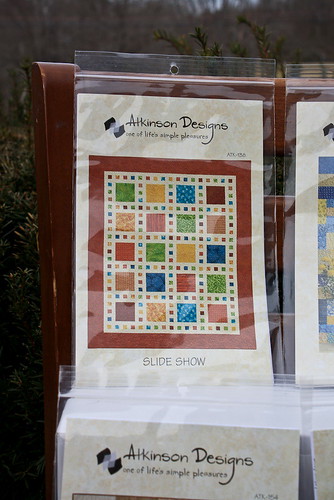
Today my giveaway includes two items, the first is a pattern that can also be found in my online store (here). It is called “Slideshow” by Atkinson Designs.

I haven’t actually tried this particular pattern myself, but if the “Yellow Brick Road” pattern is any indication, her patterns are excellent! Her directions are clear, concise, and very easy to follow. This should be an enjoyable pattern to make.

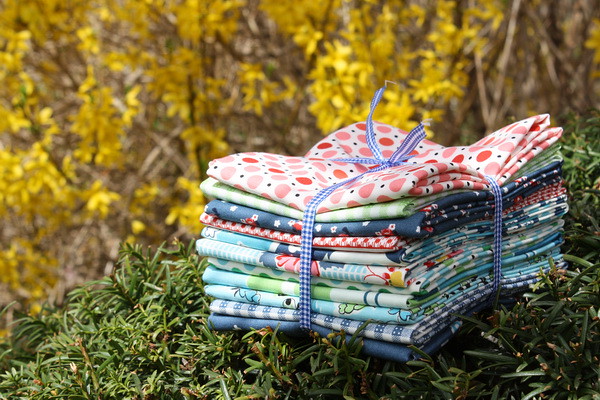
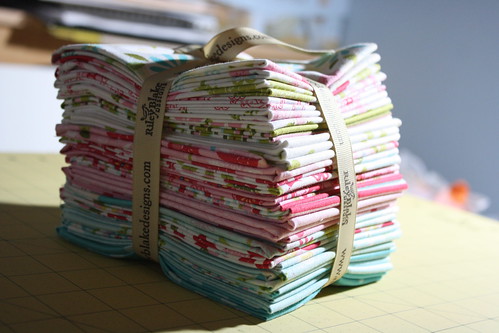
The second item included in my giveaway is this fat quarter bundle from my own personal fabric stash.

This bundle is made up of 11 fat quarters from Denyse Schmidt’s new line of fabrics, “Picnic and Fairgrounds”. One lucky winner will get both the pattern and the fat quarter bundle. These fabrics are simply divine and I think this will be a great pattern to show them off.

All you have to do to enter this drawing is leave me a comment. Easy as that! To make it fun, you can tell me what your most treasured, or most wanted, non-fabric quilting tool is.

If you are new to my blog, I am the owner of a new online shop called Dewberry Lane. We specialize in all your non-fabric quilting needs. The store just opened in mid-April, and May is our official Grand Opening month! You will find that most of our prices are currently 10% below retail. That may not last forever, but our newsletter will keep you up to date on all our specials and new items in store. If you sign up for our newsletter, our subscribers are entered into a drawing for a free pattern each month.

To celebrate my new store, I am going to allow for extra entries into this giveaway as well. Just let me know that you have done (or already do) any of the following, and you will get one bonus entry per item:

1. Sign up for the Dewberry Lane newsletter (here, left-hand side)
2. Follow Dewberry Lane on Twitter (here)
3. Follow this blog (Using Google friend to the right, or any other feed reader, just let me know what you use.)

This allows each of you a total of 4 chances to win this fun prize! I am also happy to ship internationally.

I hope you enjoy all the wonderful giveaways today, I know I will be hopping around and entering as many as I can! Be sure to check out the full list here.

Contest is now closed!! I will make a new post announcing the winner very soon. Thanks everyone!!

Happy Quilting!
Rachel

Posted on

Quilting? What’s That?

Hello out there in blogland!! Today is such a dreary day outside, that I wanted to share some of my latest quilting projects with you when I realized I haven’t really been quilting lately!! I do have quite a few older projects I need to post (which I will do eventually), but between getting ready for my son to homeschool, the new quilt store, my full time job, another online business I run, a non-profit I am vice-president for, oh and being with my family, well something had to give. Sadly it was my quilting time. I have done a tiny bit of applique on my “Family Reunions” quilt, but that’s pretty much it.

Speaking of homeschooling, I think we have finally settled on a style we are going to loosely follow. It is called the “Thomas Jefferson Education”. It’s not so much a way of home schooling, but an ideal. I really like the concepts behind it, and have found some great reading materials on how other families have implemented this in their homes. You can read more about TJed at www.tjed.org if you are interested.

I wanted to take a moment to thank those of you that took the time to comment on my last homeschooling post. Your words of encouragement mean so much to me as I go on this journey. Each day we get closer to D-Day (or would that be H-Day? LOL), I am more at ease about the process. But it is still a little intimidating to think about all the possibilities, worry about meeting new people, and making sure I don’t screw the whole thing up! So your kind words really help me know that this is the right choice, and we will be fine. So thank you.

In other exciting news, my husband and I like to mark big changes in our lives, with a fun trip. Last time we had a big change we went to Gettysburg, and this time we are going to see this guy ….

Yes, we will be going to Disney World! Yay!! I am so excited! This will be my and my son’s first time going. My husband has been before, but not for quite a while. We are taking advantage of one of the free dining offers that Disney did for 2011, so the cost is really reasonable. We are going for a whole week, so there will be plenty of time to take in all (some? very little?) of the sights. It will be just the right thing to mark the beginning of this big change in our lives.

Sorry for my ramblings today, hopefully you will find my next post more exciting! I am participating in Sew Mama, Sew‘s Giveaway Day. Be sure to check back on Monday for all the details and a fun giveaway. I haven’t decided on a prize yet, so if you want to check out my store (here) and tell me what you’d like to see as a giveaway, I may be obliged to listen.

Happy Quilting!
Rachel

Posted on 56 Comments

Online Quilt Festival

If you are new to my blog, welcome!! If you have been here before, thank you for visiting again!! Today I am very glad to be participating in the bi-annual online Quilt Festival hosted by Amy’s Creative Side.

All around the web, quilters will be posting pictures of a quilt they have made and sharing the story behind it. They then post the link to their quilt on Amy’s blog, and are entered into a drawing for a chance to win some pretty fabb-o prizes from Amy’s sponsors. I am happy to say that Dewberry Lane is one of Amy’s proud sponsors!

We have donated 2, $25 dollar store gift certificates, which you could win! Just visit Amy’s blog to see all the details.

Dewberry Lane is a brand new online store that specializes in all your non-fabric quilting needs. May is our Grand Opening month! We are hosting all kinds of giveaways around the interwebs, so if you want to be kept up to date on those, be sure to follow this blog.

We also have a newsletter that helps keep you up to date on our specials and new items in the store. You can sign up for the newsletter on the left-hand side of the store itself … (Click here). All of our newsletter subscribers are automatically entered into a monthly drawing for a free pattern every month, so be sure to sign up for a chance to win!

We also have a coupon code that is good for 10% off! Just use Festival when checking out.

Now on to the good stuff! My quilt.

This is a very special quilt to me. I normally only make quilts for my husband and my son, so there aren’t very many chances to use pink. When I won this stunning Riley Blake fat quarter pack from Stash Manicure, I knew I had to make something special for myself.

Finding just the right pattern to show off those fabrics was not easy. I have been saving this one in particular pattern in my files for some time now. It is a free pattern from Ashley of Film in the Fridge called Unfurnished.

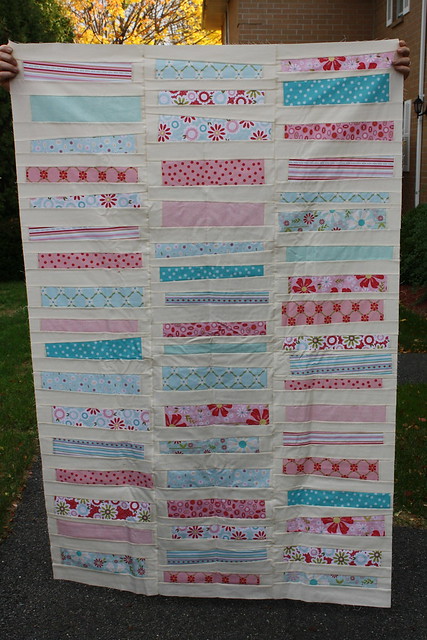
It had all the elements I wanted, a little bit wonky, easy to make, and it would show off the fabrics perfectly. I was able to whip this quilt top up in less than 2 days. Here is the finished top:

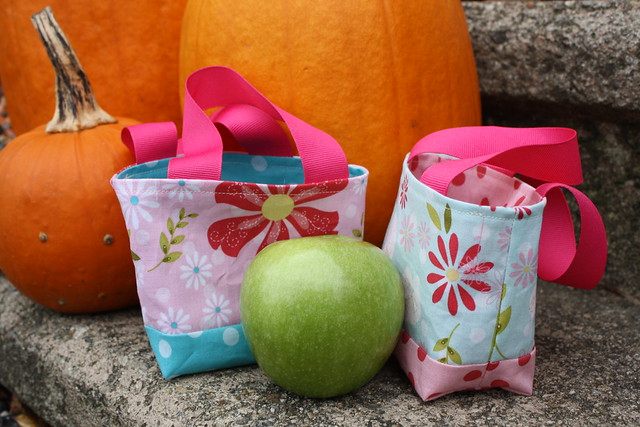
With the leftover fabric, I even made a few little bags to hold some Halloween treats.

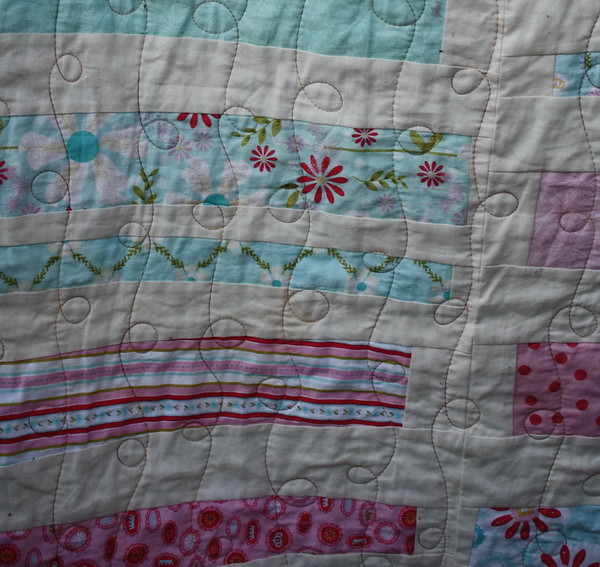
It took me about 4 months to actually do the quilting on this top. I had it on my longarm, but I just didn’t have the time to actually finish it up. In February, I finally said enough was enough and I chose a simple quilting pattern, which finished up in less than 2 hours. I just chose to do lines of loops for this one. I really like how it looks with the vertical dimensions of the top.

The backing was a beautiful sheet I found at the thrift shop, I love this fabric so much. I think it fits the quilt perfectly.

I only got to use the quilt for about a month before my son claimed it as his own. He has an obsession with blankets and quilts and isn’t too picky about what they look like. Unfortunately he also decided to use a marker one day and left the cap off right on my quilt. So now I have these lovely red splotches of marker on my quilt. Luckily it’s washable marker, so it should come right out (I haven’t had time to actually do it yet), but it makes me cringe every time I look at it.

I hope you had fun looking at my quilt. Be sure to hop over to Dewberry Lane and sign up for our newsletter to be entered into our monthly drawing for a free pattern! Don’t forget to use the coupon code Festival while you are there, to get 10% off.

Happy Quilting!
Rachel

Posted on

Giveaway Winner and New Items in Store!

I realized this weekend that I had never picked a winner for my “Back in Business” giveaway!! I am very sorry for the delay in that, I got so wrapped up in my P.S. I Quilt giveaway that it slipped my mind. 🙂 I picked a winner using random.org though, and Judy Purcell is the lucky winner!! I have been in contact with her, and will be sending out her Darcy pattern very shortly.

I also sent out the May 2011 newsletter for the store. Every month I will pick a newsletter subscriber to win a free pattern, so be sure to sign up for a chance to win! The newsletter will help keep you up to date on all the fun things happening at Dewberry Lane. You can sign up for our newsletter right at the store, on the left-hand side. This month we gave away a High Street Messenger Bag pattern by Amy Butler. The winner was chosen and contacted and her pattern is going out in today’s mail.

Be sure to keep an eye on this blog in the coming months as I am hosting a few different giveaways on popular quilting blogs around blogland. I will post here when they are live with a link of where to go to participate. You don’t want to miss out on the prizes!

I also wanted to take this chance to tell you about some new products we have up in the store.

If you have never seen Kate Conklin’s designs, you are going to be in for a treat. I have to say that as I uploaded each pattern into the store, I was dreaming of the fabrics I would choose for each one. Even the heart applique one, which is a bit beyond my normal quilting. All of her patterns are so pretty and inspiring. The best part is, they are downloadable! No shipping costs, no stalking the mailman. Just pay, download and get to sewing that very day. Be sure to check them out! (click on any of the images to be taken to the store)

Happy Quilting!
Rachel

Posted on 5 Comments

Paper Piecing with Freezer Paper

Today I am going to talk about a little known form of paper piecing. I do not claim to be the originator of this method in any way, shape, or form. I first saw the method demonstrated on the Twiddletails website when I jumped into her Geese in the Forest paper piecing quilt pattern. I have shown my progress on this quilt here before, but I am enamored with this quilt.
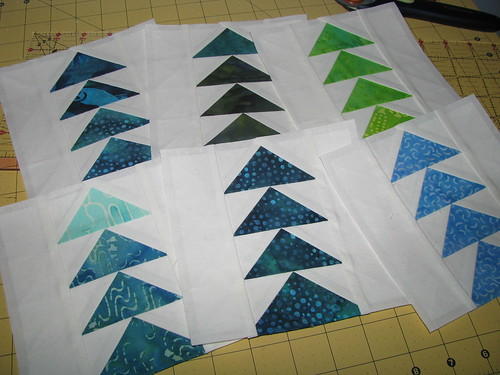
I am not sure if she is the originator of this paper piecing method, but this is how I do all of my paper piecing now. Even my Dear Jane blocks get done in this method. I love it!! I am going to do a tutorial for you today. My method is slightly different from the tutorial I saw on Twiddletails. I hope you like it enough to give it a try as it’s really not that hard, and you will discover so many benefits over the traditional way of paper piecing (which I will point out as we go).

Before you get started, you need freezer paper. You can find this at the grocery store in rolls. That is what I used when I started, but then I discovered this stuff:

This is freezer paper that is cut into sheets that fit in your printer. In my tutorial I used the rolls because I didn’t have any of this on hand when I was taking the pictures (a few months ago actually). But let me tell you, this pre-cut stuff is well worth the slightly added cost. Trying to tame the curled paper to fit in your printer is no treat. We do have this in the store of course, C. Jenkins Freezer Paper, and it is 10% off retail right now.

Once you have your freezer paper, you will want to print your pattern right on there. Be sure to print on the papery side, not the shiny side. Any ink-jet printer will work (laser printers will work too, just use Google to find directions), as the papery side is just like normal paper. If your block is directional, please remember that your block will be a mirror image of what is printed, so if the pattern has not already done it for you, you may need to use an image software to flip your design before printing. Once printed, cut the pattern out on the seam line. Follow your pattern instructions to determine where else to cut, you are not cutting out each individual piece, just the blocks that will be paper pieced together.
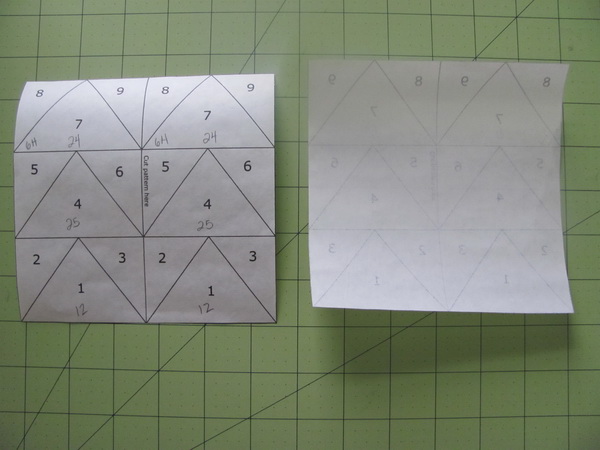
Now I pick out my pieces of fabric for the block, I usually rough cut the shapes of each piece leaving a generous seam allowance.
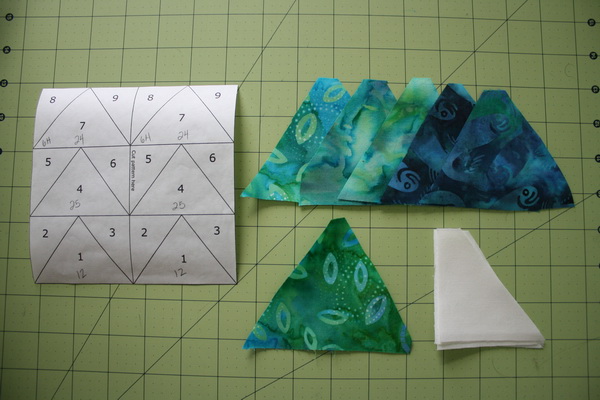
You can see that I have cut down the line in the middle of the block. This is specified in the instructions for the block. Some blocks will have no extra cuts, some will have a few, just be sure to follow your pattern.
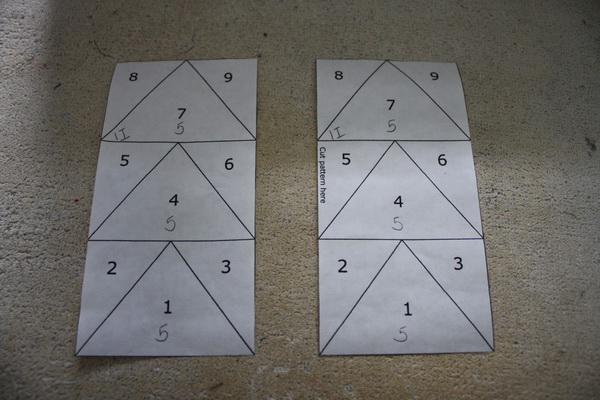
In these pics you can see that I have hand written numbers on the pieces. This corresponds to the fabric I will use. You certainly don’t have to do this part, but it does make it a lot easier to keep everything in line while you are piecing. The printed numbers are for the actual paper piecing, they will tell us what order to sew in.

Take your fabric piece number one, and lay it right side down under spot number one. The wrong side of the fabric should be touching the freezer paper. Make sure to leave at least a 1/4 inch around all the sides. Iron the freezer paper to the fabric. Try to only iron in the number one spot, it will make doing the rest of the block so much easier.
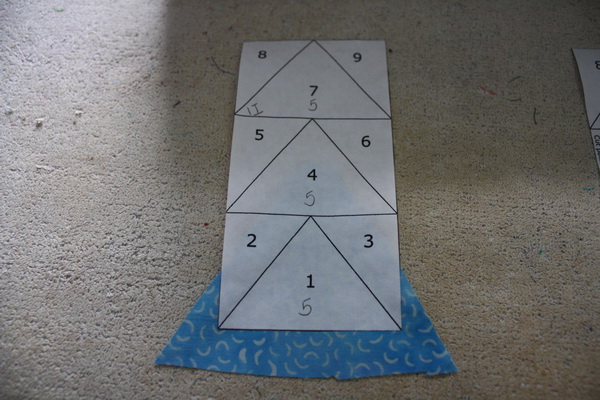
Fold along the line between the number one and number two spot. You should be able to see your lines easily through the back of the freezer paper.
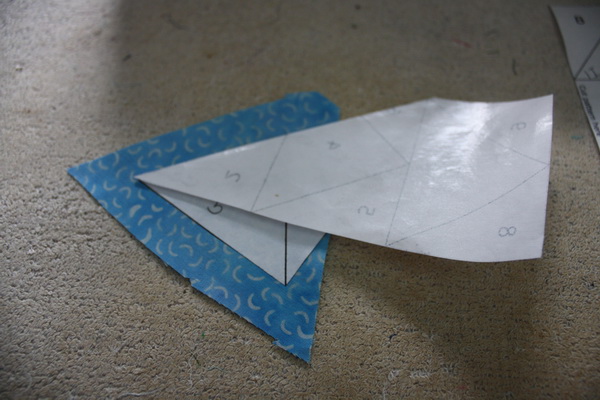
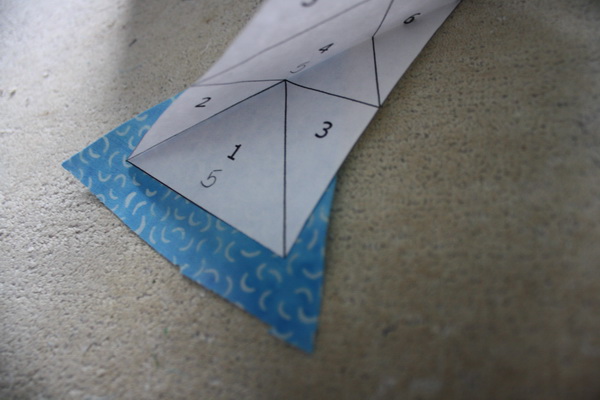
Pick your fabric piece number two up.
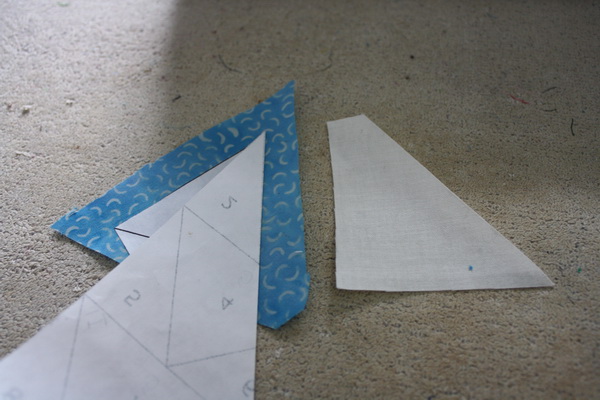
This part is where we come across one of the benefits of this method of paper piecing over traditional paper piecing. With regular paper piecing, you have to place the piece of fabric on the opposite side of where it is going end up, so it is kind of a guess as to the size of the piece of fabric you need, especially with something like triangles. This can be such a waste of fabric in the long run. With this method, the piece you are filling is folded back to the right spot, so you can hold your piece up to the light and line it up perfectly. This allows you to cut pieces that are close to the correct shape and waste less fabric.
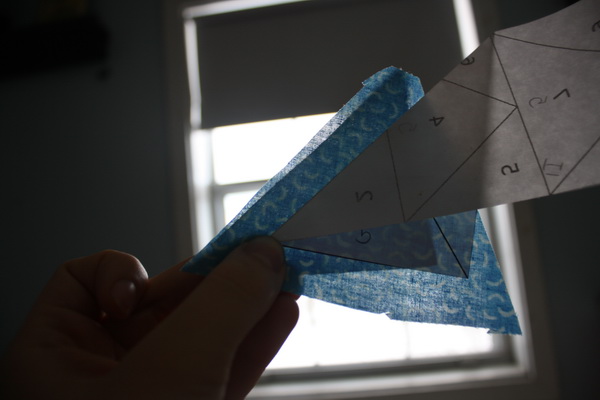
Place piece number two behind piece number one with right sides together. You can see where piece number two is folded in front, and the fabric itself is placed perfectly to fit it. We will be sewing along the folded edge of the freezer paper.

You can start sewing at the beginning of the fabric, and sew right along the edge of the folded edge of the freezer paper (do not sew through the freezer paper, just right next to it).
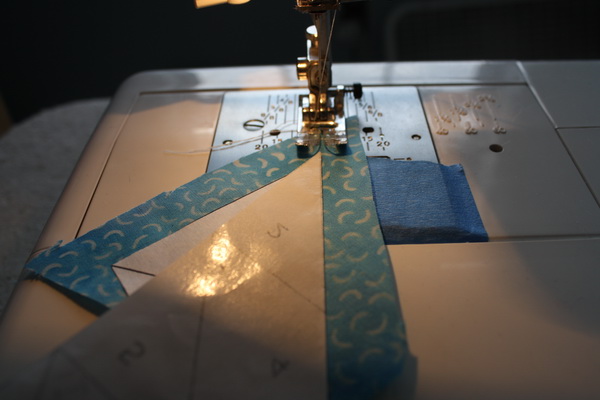
This is where we have another benefit of this method over traditional paper piecing. You do not have to stop when you reach a line. Since we are not sewing through the freezer paper and are folding the freezer paper back, there is nothing in the way of our sewing. You start at the beginning of the two pieces and sew all the way to the ends of the fabric, you don’t have to stop at the end of the freezer paper, just continue the straight line off the fabric.

Because you are going to the end of the fabric, you can actually chain piece these blocks, you can see here I went to the end of my first piece and then slid my second one under the needle behind it.

This makes the blocks go much faster and is much easier than the “stopping at a certain line” method of traditional paper piecing.

Once your line is sewn, you want to trim for your quarter inch seam. Just line the quarter inch line of your ruler up on the seam (folded edge of the freezer paper) and trim to a quarter inch.
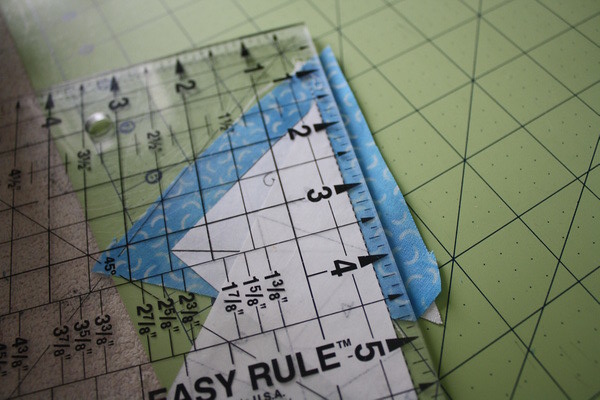
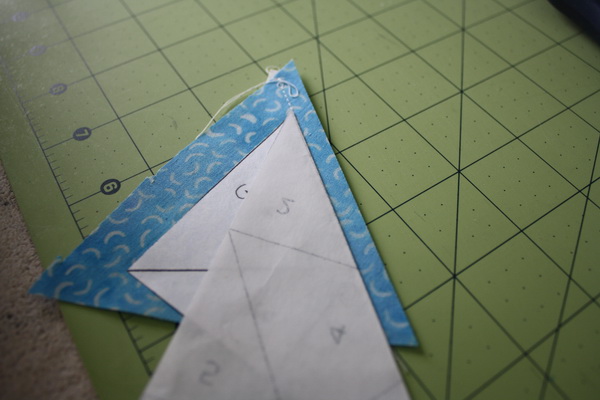
Unfold the freezer paper and fold the fabric for piece number two back into place. Iron the piece to the freezer paper, making sure to iron only in spots number one and two.
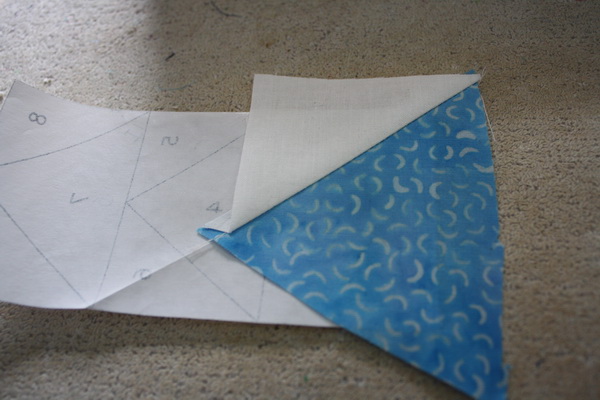
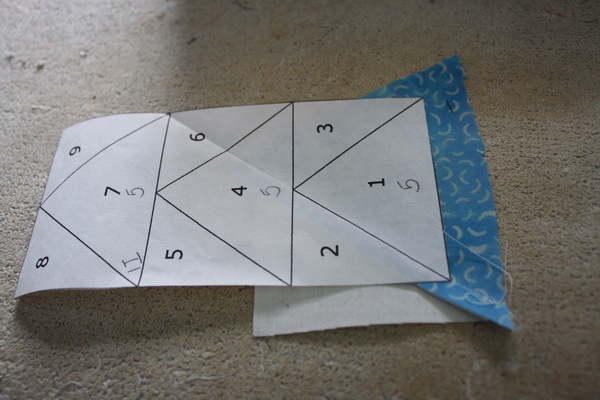
Next fold along the line between spot number one and three, and repeat all of the above steps. Continue on in this way for each spot.
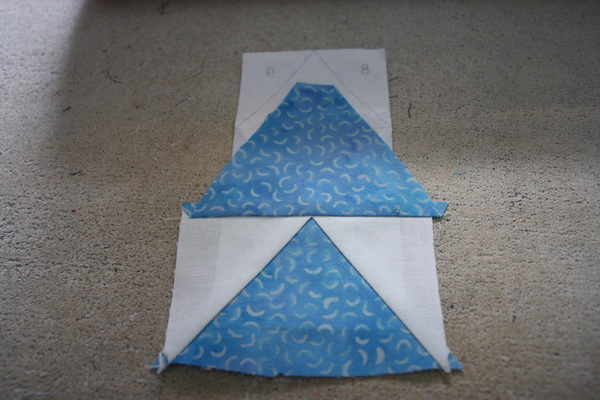
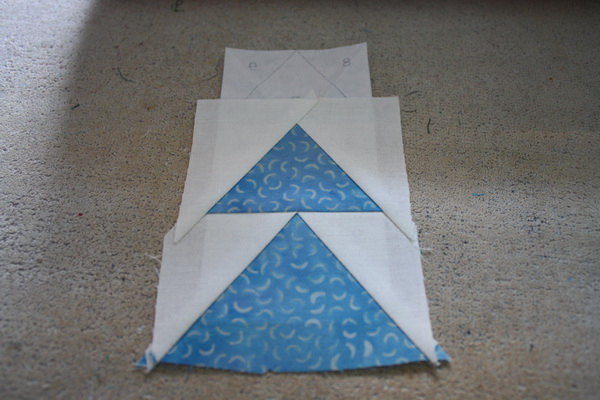
If you have multiple pieces for the block, you will need to join them together now.
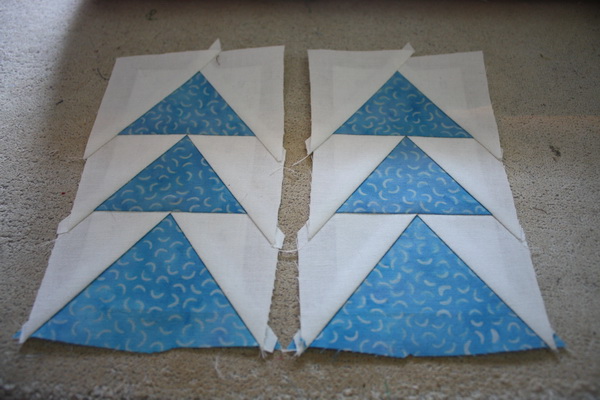
First trim around all the block edges, lining the quarter inch line of your ruler up to the edge of the freezer paper. Trim your quarter inch seam.
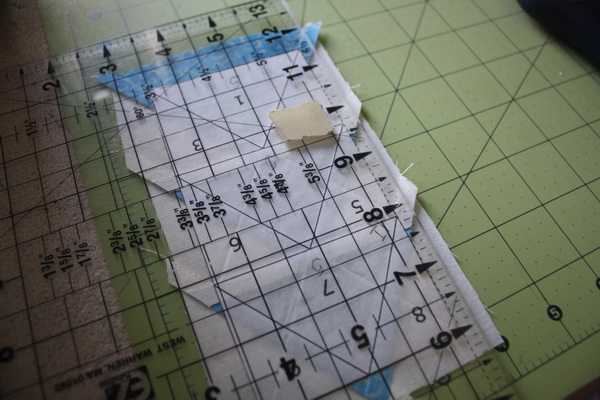
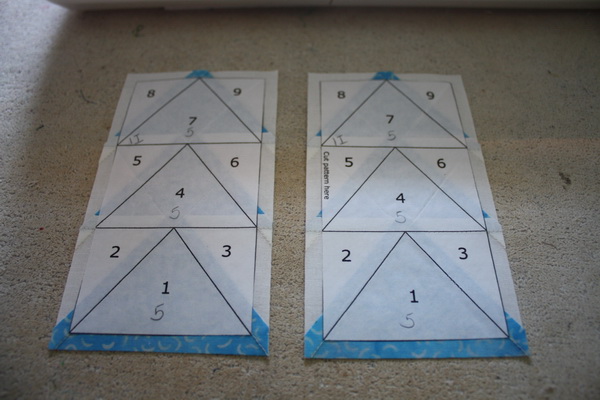
Now lay the two pieces right sides together, if you trimmed properly, you should be able to line the top and bottom of the pieces up and have accurate results. Pin the pieces together in the seam allowance.

Sew right along the edge of the freezer paper. If everything was lined up right, you should also be sewing along the edge of the freezer paper on the bottom.

Open up the block and iron the seam. I ironed this one open since there is a lot of bulk.
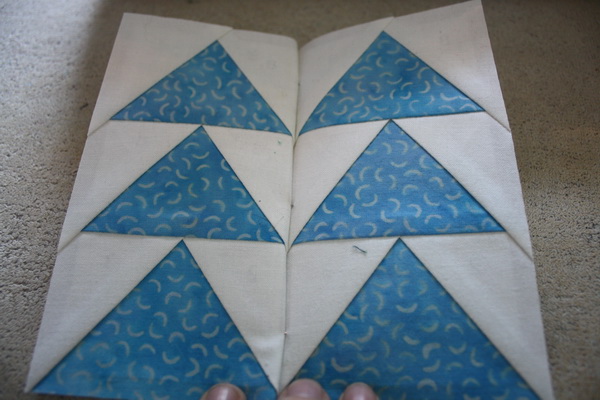
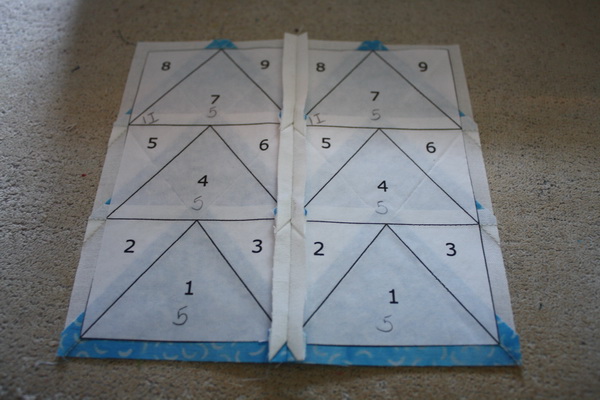
Turn your block over and admire your work.
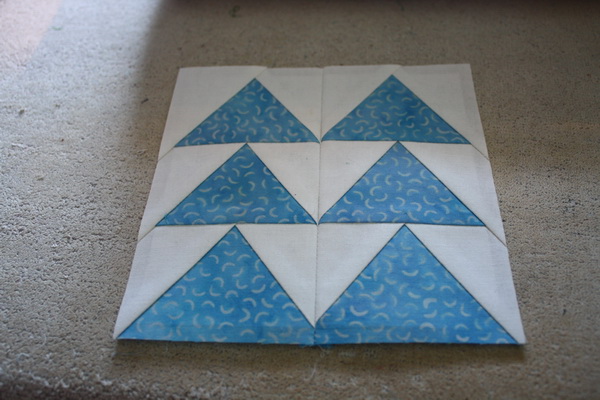
The freezer paper on the back can now be peeled off. This is another added benefit to this method. With the traditional paper piecing, the stitches are sewn right through the paper, which can make getting the paper off hard and possibly stretch the block. With this method, there is nothing sewn through the paper so the freezer paper will peel right off of the back without distorting your block.

You may want to use Google to find a simple, free pattern for paper piecing. Any block that can be done with traditional paper piecing can be done with this method. I find this method to be so much easier than the traditional method and I think, once you try it, you will too.

Happy Quilting!
Rachel
Posted on 9 Comments

Big News and a Giveaway!

Yesterday my emotions ran the gambit of utterly elated to completed frightened. It was quite a roller coaster to say the least. Since my husband got out of the Marine Corps, our family has been of the dual income kind, however starting on July 31st this will no longer be the case. Yesterday I walked into my work and submitted my resignation. It was very difficult to do as I truly enjoy my job, the company, and the people I work for. But our family path has started to head in a new direction. We just feel that our son needs to be home-schooled, even if it is just for a year. He needs the space to spread his wings and grow into himself without all the rules and restrictions that are necessary in a public school. This will not be an easy time, the budget will be small, but the rewards will be huge. I cannot wait to spend more time with this amazing kid.

So that is my big news for today. It may not be big to other people but to us, this is huge!! It will be a journey for sure, but like everything else we have done in our lives we will figure it out as we go. But now I want to tell you about the giveaway part of this blog’s title!

For the next couple months I am a sponsor on Rachel (great name! :)) Griffith’s blog, P.S. I Quilt. If you haven’t seen her blog, be sure to head over there and check it out, especially today! Rachel is hosting a giveaway in honor of my new store Dewberry Lane.

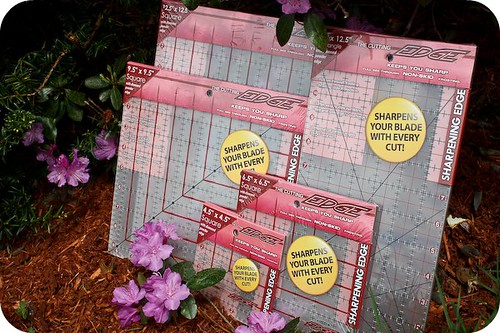
Up for grabs is a pack of CuttingEDGE rulers. I have been using these rulers for a few months now and I love them!! It took a little adjusting to get accustomed to using a new ruler, but now that I have worked out all its quirks, I adore how it really sharpens my blade as I am cutting. I haven’t had to put a new blade in since I have started using it, and I can still easily cut through 6 layers of fabric!

The giveaway is a $75.00 value and includes the following rulers:

12.5″ x 12.5″
9.5″ x 9.5″
6.5″ x 12.5″
6.5″ x 6.5″
4.5″ x 4.5″

A nice variety of sizes to fit all sorts of quilting needs. Be sure to head over to Rachel’s blog to get an entry!

Ruler Giveaway

So does anyone out there in blogland home-school? Any tips or advice? I have 3 months to get a plan together, find a group and convince myself that this was the right decision to make. 😮

Happy Quilting!
Rachel

Posted on

Weekend Prequel

I am so looking forward to this weekend!! I have so many aspirations for getting things done. Most likely many of them will not happen, but it is so much fun to go into a weekend with such high hopes.

If you take time out of your weekend plans to read this little post, be sure to check out my giveaway post from a week or so ago and comment over there for a chance to win a Darcy pattern. The post is here. I will draw a winner on May 1.

You may also want to pop over to the store and check things out. May is our official Grand Opening month and all the items in the store are listed at 10% below retail, no coupons needed!!

http://www.DewberryLane.com

If you sign up for the newsletter while you are there you will also be entered into our monthly pattern giveaway. The first newsletter is one of my goals for the weekend, so that should be out sometime this coming week.

May will be a very busy month for giveaways for the store. To celebrate my Grand Opening, I am having giveaways and sponsoring sites in a few different places around the blogosphere. Be sure to keep an eye on my blog and I will point you in the right direction.

I hope all of you have a very fun and productive weekend!! Let me know what you’re doing if you care to share!

Happy Quilting!
Rachel

Posted on

Yay for Payment Options!

I just wanted to pop in a post real quick to let everyone know my store officially allows for credit cards now! To celebrate I am offering a 10% off coupon through Sunday. Just visit the store:

Dewberry Lane

And enter the code: blogity

Be sure to sign up for the store newsletter while you are over there to be sure you don’t miss any new items, giveaways, or sales! All newsletter subscribers are entered into a monthly pattern giveaway as well.

Happy Quilting!
Rachel
Posted on 1 Comment

MQX East

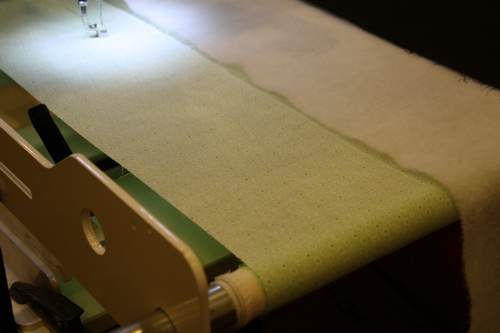
Last weekend I headed down to Rhode Island to take a class at MQX East. I was so excited to go that I woke up at 4:00 AM and couldn’t get back to sleep!! Luckily I didn’t wake hubby up until 5:00 AM, though I am not so sure he would call that lucky. This was my first time going to the MQX show, and the first time I have taken a class at any big show like this. I signed up for a hands on longarm class, and to say I was nervous would be an understatement. I had visions of me going into class and tripping on the first machine and knocking them all over one by one like a set of dominos. Now that would be classy, especially considering how sturdy these machines are. But if it could happen, I would probably be the one to do it. Luckily there was no tripping when I entered the class room. Just a lot of smiling faces. I signed up for this class hoping I could find some glimmer of hope that I might one day be able to sew something more than a nice looking meander on the machine that takes up half my basement. So I was pretty stoked when I learned something before the class even started. I learned that I have been putting my backings on the roller backwards!! This is how it *should* be done:

See how the backing is over the roller, well my backing has always been under the roller. Oooops ….. Luckily this didn’t affect the quilt or quilting itself, but every time I put a quilt on there I seriously wondered how in the world people do it. Nothing rolled smoothly and it took me longer to roll my quilt than it did to sew it!! Just for this reason alone, I am excited to get a new top on my machine. And of course I learned lots of new and wonderful things in the class that I cannot wait to try out!

After the class I headed over to the vendors to see what they had. When you go to a show like this, it’s easy to get distracted by all the shiny new toys, but my goal was to collect cards for products I thought would fit well in the store. I would like to have a tricked out longarm section, so this was a great chance to have a peek at some of the items available to longarmers. Of course I had to stop by the Superior Threads booth (who can resist all those pretty thread colors) to pick up some items for the store. I think I saw a lady giving me the eyeball as I was throwing things into my cart …. I’ll have one of these, two of these, one of these, oooh and three of these …… Good thing hubby wasn’t there, he *may* have had a heart attack. Pictures coming soon of my haul!! I already list a few tension gauges in the store, hopefully the rest will be up real soon.

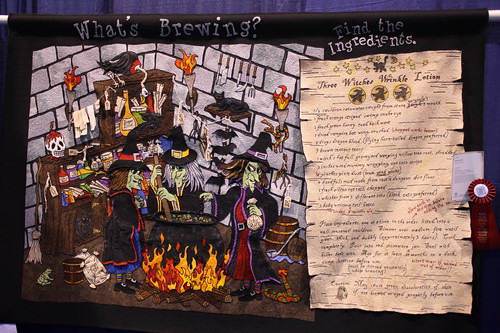
After the vendor mall, I meandered over to the show quilts and let me say I may have cried a little tear of envy. These quilts were stunning!! However, I have to be honest here, there was only one quilt that moved me enough to haul out my camera and take some pictures. This quilt won second place in Art/Pictorial and was made by Cathy Wiggins. I will admit I *may* have an unhealthy obsession with Halloween, so this quilt was right up my alley.

This is a full shot of the whole thing. There was soooo much detail in this quilt.

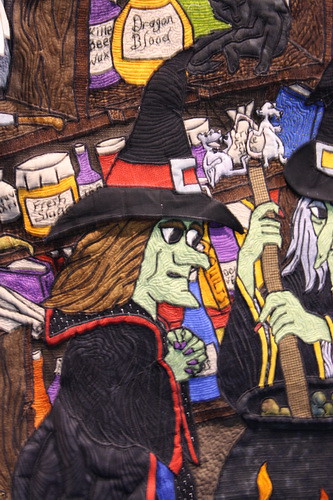
Here is a shot of one of the witches and a bit of the background.

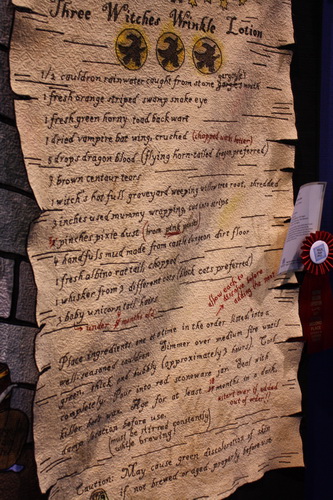
Here is the scroll, which was all hand embroidered. I believe it said it was about 250 hours spent on just this scroll.

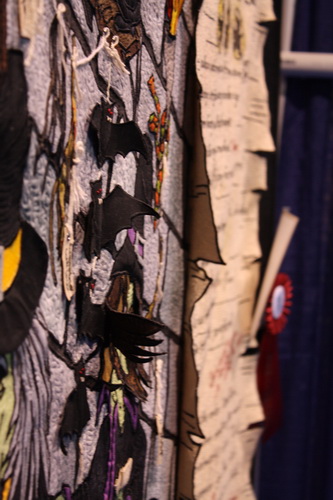
The best part was the 3D quality of the quilt.

I wasn’t sure how I would like MQX, but it turned out to be well worth the drive down. I could see this becoming a yearly tradition.

Happy Quilting!
Rachel
Posted on 47 Comments

Back in Business

I thought this day would never actually come, but I am happy to say that my new store is finally (yes finally) up and running! For now we are only able to accept payment by PayPal, but we should have the ability to accept credit cards in about a week or two. There has been quite a bit of drama associated with getting this all set up (hence the delayed opening), but I was finally able to get everything right back to where I wanted it to be.

I will add some more posts in the coming weeks explaining some of the trials and successes I had in starting the store, but I wanted to pop a post up here to let all of you know that I have finally done it! And the one thing I couldn’t be more proud of is the fact that I did all of it myself. I have a friend that has an online store and she pointed me in the right direction, but the actual mechanics of building the site, adding inventory, setting up payments options …. those I did all by myself. And let me tell you, it was not easy (though I will admit I may have made it harder on myself than I needed to).

You can visit my little corner of the web here:

www.DewberryLane.com

I’d love to hear what you think of our product selection, navigation, visibility. Do you have suggestions for other products? We are still adding items we have in stock, but we are always looking for new items to add to our inventory as well.

If you visit my site and leave me a comment on this post letting me know what you think, you will be entered to win a Schnibbles pattern called Darcy:

A winner will be randomly picked from all eligible comments on May 1, 2011. Please be sure that you leave me a valid email so I can contact you if you win. If I do not hear from the winner within a week, a new winner will be picked.

I have also been working on a lot of quilts, and I even have a tutorial for you coming up. Be sure to keep an eye on this blog, as now that things are settled with my store, I plan on posting here much more often.

Happy Quilting!
Rachel

Posted on 1 Comment

We have a Winner!

So I have been working feverishly on the site. I was hoping that I could have the site live by, well, today actually, but due to unforeseen circumstances I have had to change my whole website game plan. It’s not a huge deal, but it does mean more time, like 6 weeks more time. While I am bummed about the delay, I am happy that the site will be built right. There is nothing worse than having a broken site. In the mean time I have been doing some sewing, which I will take pictures of and share with you soon!

On to the winner though! I picked a random winner from my last post and the small cutting mat goes to …. Kelly! She wrote:

I like the tiny applique pins and the longer pins with blue and yellow glass heads. I use the Bohn marking pencil – love it. I am always drawn to ‘new’ gadgets and notions… Looking forward to visiting your shop!
Another Quilting Board Buddy,
Kelly

Send me an email Kelly and I will get your prize out to you.

Happy Quilting!
Rachel

Posted on 10 Comments

What to Sell?


Thank you to everyone that left a comment on my last post!! You all had such great ideas for what you like in an online quilting store. I continue to work on the store, but have hit a slight snag. Hopefully it will not hold me up for too long, I am thinking it will not. As of now I do not have an official opening date, but I am plugging along, putting together all the little pieces.

Before I get to the next story in my trials of opening this store, I wanted to announce the winner of the pattern from last week.

By way of random.org, The winner is:

Frances AltBahr says:
January 17, 2011 at 3:55 am (Edit)

I have only made 3 quilts, so I am pretty new to all of this. I search alot but never have ordered online I wasn’t sure how the colors came out by not seeing the items. I love your store name and wish you much success! I got your web from the quilting board which I love to read. I will be checking this site often also, and marking this in my ‘favorites’ Again, good luck and have fun!

Contact me and I will mail out your Schnibbles X-Rated pattern:

Congratulations!!

One of the biggest challenges of starting up an online store is deciding what inventory to stock. It took a little work to find wholesalers and set up proper accounts, but once I was all set up I was staring at thousands of potential products. Which ones should I choose? What colors should I pick? How many of each item do I buy? Do I want to cut fabric? What tools are useful? Which patterns are hot? What books are useful? So many questions!! Answering these and making a decision was not easy.

The first decision I had to make was whether or not I wanted to sell fabric. Buying bolts of fabric is not an inexpensive endeavor, so I had to decide right away what kind of store I envisioned having. There were many considerations that went into this, how much time would I have to pack boxes? Where would I cut fabric? Where would the inventory be stored? Would I sell pre-cuts? How much could I invest? But most of all, what is the need for quilting stores online? Where and how could I differentiate myself? The questions never end!

There are a lot of quilting stores online, I have shopped at quite a few of them. All the stores I have been to sell a drool worthy selection of fabrics. However, there does not seem to be a good selection of stores that only sell quilting supplies and notions. Yes, many fabric stores sell notions as well, but there is only so much of those that they can stock. I am sure they have storage and cost restrictions as well, and buying bolts of fabric uses up a lot of these resources. What if there was a place where you could buy thread, batting, rulers, needles, spray adhesive, books, patterns and more all in one place? There aren’t many stores like this and that could mean that either 1. No one has given it the old college try yet, or B. It just wouldn’t work. These are both considerations to take into account.

Another consideration was where I would be keeping my inventory. I have a nice spot in my house that is secluded and gets no traffic. It would be perfect for storing inventory. Although the space is perfect, it’s also not very large. There wouldn’t be a lot of room in that area to store bolts of fabric, nor would there be enough space to put a cutting table. Of course if I felt that having the room for these items was very important, I could find a way to expand the space, but I really wanted to keep things contained in the one area for the time being.

So with all these thoughts in mind, as well with a few other considerations like being able to pack boxes quicker and being able to use my husband and son more, I decided that my store would not sell fabric by the yard. It was almost a relief when I made that decision actually because I have a hard time picking fabrics when I go to a fabric store. Making a decision like that actually almost makes me hyperventilate! So I was relieved to know that I wouldn’t have to decide what fabrics to stock, which ones would sell well, or what colors pop with each other. I could leave that to all the other stores out there that do such a wonderful job at it. I may perhaps sell pre-cuts one day, but for now my store is a fabric free zone.

Once I decided that my store would be notions and supplies only, I was still faced with which notions I wanted to stock initially. Ideally I would love to stock everything out there, but that’s not feasible nor does it make sense. I don’t want to have items in my store just for the sake of having items in the store, I want to have things that people want. So I did a little ‘market research’ asking around what people are buying for notions right now. I follow over 100 quilting blogs already, so I watched what the bloggers were using, and I put all this information together to make a list of items I wanted to sell. The initial list was small and included things like this book:

Written by a blogger I have been following for quite some time.

I also had the ever popular Schnibbles patterns and books on my list:

And how could Dear Jane not be on my list:

I also added a few items that I have enjoyed using to the list. Like this pattern:

Or this one:

And this chalk pencil:

Plus there were so many more items on my list!! As I poked around the websites and fliers I found new and exciting things that I had never used or weren’t mentioned in my research, but I thought they would be fun and useful to people. I kept a list of all these items in an excel spreadsheet plus the cost (lest it get out of hand). Soon I had a nice long list of items I could stock for my store. I went back and forth with myself of how many of each item to buy, what colors to stock, and how many varieties of similar items I needed. I know my store will grow as business comes in, but I also want to have a good selection for opening day. It wasn’t easy, but after talking with people I know that run online stores, and just sitting there crunching numbers, I finally settled on amounts and colors and was ready to place my order.

It took me two months to place the order for the items though. Why? Because what if what I ordered wasn’t right? What if none of it appealed to anyone? I think this is a common fear, but it would have been enough to shut down production right there. Once again though, my husband stepped in and and told me to just go for it. We have a back up plan if things shouldn’t work for some reason. Plus he reminded me what I always say “If you don’t try you have already failed, if you try at least there is a 50% chance of success!” I processed his words and swallowed my fears and jumped in and placed the order.

Thank you again for listening to my tale. Of course there is so much more, but I do want to save some for another day!! I would love to have another giveaway today as well.

This mini self-healing mat is from Omnigrid:

At 5 7/8″ by 8 7/8″, this little mat is just perfect for rotary cutting smaller blocks. The small size makes it easy to turn the block around for easy cutting, which helps you be more accurate than if you had to constantly shift the block itself. I use smaller mats like this for making a disappearing nine patch where you are making multiple cuts that must stay lined up.

All you have to do to enter is leave me a comment by January 29th. I would love to hear what non-fabric notions, patterns, books or quilting supplies you are using lately or are looking to buy. You can also just say hi! If you are a blog follower (either through the widget over to the right or through any blog reader like Google or even if you have my site saved in your favorites and you check back often for new posts), feel free to leave a second comment telling me such and you will get a second entry.

Happy Quilting!
Rachel