Posted on

Chinese Pork Recipe

We made another family favorite meal last night. We are working on keeping our calorie intake down, so finding meals that are lower in calories is a priority for us. This is a fairly simple meal, but it does take a bit to get the pork cooked, we prefer this meal for a weekend when we have more time to prepare.

______________________________________________________________________________________

Chinese Pork

Boneless Pork Ribs
Chinese Style Ah-So Sauce
Broccoli cut into small pieces

Boil pork on high for 1 hour.
Steam or boil broccoli until soft.
Turn broiler on on oven. Cut the cooked pork into bite sized chunks and mix with Ah-So sauce in a bowl. I usually use half the bottle (to help keep calories down), but it will depend on how much pork you have. You want your pieces to be fully coated in the sauce.

Spread covered pork into a single layer on a cookie sheet, I put down aluminum foil first for easy clean up. Place pan under broiler for a five minutes or so, turning the pork a few times while it is cooking. You want the sauce to caramelize on the pork, but be careful it doesn’t burn.

Serve cooked pork with your broccoli and enjoy!

______________________________________________________________________________________

The longest part of this recipe is boiling the pork to pre-cook it. You could even do this the night before and refrigerate the pork to be used the next night. When you put the pork under the broiler it will warm it right back up.

Lately I have been picking up my dinner the same night that we are eating it. I swing by the grocery store on the way home. I really like doing this as it means we don’t have a lot of extra food in the house that we are tempted to eat. Hubby and I are working on counting calories to drop a few pounds, and it’s not always easy to keep our calories low. Keeping food out of the house helps us stay on track.

Happy Eating!
Rachel

Posted on 97 Comments

What’s in a Name?


So now you know my big secret. I have been planning this store for a couple months now, and the one thing I have learned is that it is a LOT of work opening a store! I thought it would be, just buy some stuff, throw it online, call it a store …. but there is so much more to it. I was thinking it might be kind of fun to share with you bits and pieces of my process for opening the store. I love reading when bloggers share a “behind” the scenes, so maybe you will too.
 
The first hard decision I had to make was what to name the store. Did I want to go with the obvious and put the word quilter or quilt in the title? This has its benefits as people would be able to know what kind of stuff I sell straight from the get go. But it also has its own set of limitations as what if I want to sell embroidery stuff? Yes I could do it, but people might not think a store called Quilter’s Playhouse (or whatever) would sell anything except stuff for quilters. This is a constant naming battle, should your product name describe what it is? I have found that more often than not, a store or product name does not describe itself. Yes you have the Taco Bells of the world, but you also have names like Sears, Wal-Mart, Victoria’s Secret. We know what these stores sell because we have been there. But if you had never ever heard of Sears before, you may not know if it was a restaurant, a clothing store, a stationary store, or even a gun store! But once you go there and the name becomes popular, you know what they sell so it doesn’t matter what the name of the store is.
 
Because of this reasoning, I knew from the get go that I wanted my name to be free of the word quilt or quilter. I know of a lot of stores that use these words, and I love going to them, but for me I didn’t want to limit myself that way. So I had to meander along and find a a name that I liked. My first choice was obvious. The domain that this blog is on is mine. I bought Scrapendipity Designs some time ago and haven’t always used it, but I have been using it as a quilting blog for a while now and there are a good number of people that visit my blog and know the name. I could easily add a store right here and call it a day. However, as much as I like this name, I also had another domain under my belt that had never seen the light of day.
 
I bought the domain for Dewberry Lane about 2 years ago when I was more into digital scrapbooking. A friend and I were going to start a scrapbooking business, and I came up with the name Dewberry Lane and since the domain wasn’t taken yet, and I didn’t want to lose it, I went ahead and bought it. Well the business fizzled out after only a month or two of planning, but I was able to keep the name and the domain since it was my idea. I held on to the domain, renewing it every year, even though I wasn’t using it, because I thought the name was really catchy.
 
So when it came time to name my new business, I really felt that Dewberry Lane was the right name for my store. The name evokes thoughts of a peaceful, back country road for me. A tree lined street where you could take a walk in the afternoon and say hello to all your neighbors. Where houses have front porches with rocking chairs on them, ready for two people to sit, sip lemonade, and chat the day away.


Something like that. This was too beautiful an idea for me to just give up on, so I finally made the decision and named my store Dewberry Lane. While it has basically no name recognition like my blog already has, it is a catchy name that I thought people would easily remember. The best part was, I didn’t have to worry about anyone already owning the domain for it, as it was already mine! So I dusted off the old domain and started the process of figuring out how to turn it into a store.
 
After settling on my name, it was time to focus on building a site, creating a logo, and deciding what product I wanted to sell. These three items alone were the most nerve wracking of the whole process. There were many times while I was working on these three things, that I told my husband that it couldn’t be done and I wasn’t going to do it. Luckily he kindly reminded me that these things really weren’t that hard and I shouldn’t let them defeat me. So with his encouragement, I plugged along.
 
I don’t want to make this post too long, so I will share how I muddled through those steps in other posts. If you actually made it to the end of this post though, then I think you deserve a giveaway! One of the items I will have in my store is a good number of Schnibbles patterns and I would like to give one away today.


This pattern is called X-rated. It finishes at 31″ x 31″ and you could easily make it with 2 charm square packs and a yard of background fabric.
 
So how do you enter my mini giveaway? Well all you have to do is leave me a comment. I would love to hear what you like in an online store, but you can also just say hello. If you are a follower (either through the widget over to the right or through any blog reader like Google or even if you have my site saved in your favorites and you check back often for new posts), leave me a second comment with how you are a follower and you can have a second entry. Be sure to give me a valid email address so I can contact you if you win!
 
The winner will be announced on Saturday, January 22, 2011.
 
I do plan on having more (and bigger) giveaways as I get closer to opening, so be sure to check back often!
 
Happy Quilting!
Rachel

Posted on 6 Comments

Dewberry Lane

Last I posted I told you that I had some exciting news for you. Well I have a small sneak peek today in the form of a video:


Coming soon to the interwebs near you, I will be opening an online store, Dewberry Lane. The above video is a sales pitch for one of our items from our highest grossing salesman.


The store isn’t quite ready yet, but I would love to hear some ideas of what you would like to see. Product, classes, tutorials … what would bring you to my store? As we get close to opening we want to help make our store useful to you!
 
Happy Quilting!
Rachel
Posted on 3 Comments

Small Project Inspiration

Thanks everyone for your kind words about the month I have been having. I am plugging along getting things done, preparing for the holiday (less than 2 weeks till Christmas!!), and trying to fit in some family time.

Today I have a blog post over at Stash Manicure. You may have noticed that occasionally here I like to share what I call ‘Quilty Inspiration’. These are quilt ideas that I have collected over the years from other great blogs. I collect all kinds of ideas, from all different genres, using a website called vi.sualize.us. This website allows you to collect pictures from all over the web and link to the site where the picture came from. I prefer this way of bookmarking, as I find so much more inspiration flicking through the pictures than I do from the bookmark list that is built into my browser. To get an idea of how this works, you can see my category for quilt tops here.

A few days ago, I was working on a scarf project (which I post about very soon), and it made me think of all the quick, non-quilt related project ideas I have stored. With the holiday season around us, these projects are wonderful for using up our stash and perhaps crossing a few names off our present list. I love to give my stash a quick manicure with smaller, one-day projects.

Here are a few great projects with links directly to the website/blog they originated from.

Bird Mobile from Spool Sewing
I have made these little birdies myself. They are quick and easy and look really cute around the house. I never actually put mine on a mobile. I just tucked a few in my collection of old cameras.

Burp Cloths from A New Chelsea Morning
I have not made these yet myself, but my sister is due to have a baby anytime, looks like I should get to sewing!

Singlet Style Shopping Bag from QueenofDIY, a member at Craftster.org

I made one of these and I love it. It has the same shape as a plastic grocery bag from the stores, which makes it easy to fold up and take with you.

Chalkboard Placemat from Little Birdie Secrets
This is another one I have not made yet, but I think it is such a fun idea! It would give my son something to do while waiting for dinner to make it to the table at least.

Rag Quilt Letters from Happy Together
These look like so much fun! I would have loved to have thought of making something like this when my son was young.

Buttercup Purse from Made by Rae

I have made two of these little purses. They were super quick to make, using just 2 fat quarters. I actually added a magnetic snap to mine. I keep one in my large purse and when I just need to run somewhere real quick, I grab it and just put my wallet in there.

These projects are just a few of the ones I have saved. If you have never seen vi.sualize.us before, be sure to check it out, it is a great way to keep track of all those projects you come across on the web.

Happy quilting!
Rachel

Posted on 3 Comments

Busy/Sad Month

You may notice that my blog is going to be a little quiet for a bit. This has been a rough month so far. On November 30th I had one Grandmother pass away. We held her funeral on Saturday, December 4th. Then sadly on Sunday, December 5th, we found out that my other grandmother passed. I attended her funeral today. Needless to say, these past 2 weeks have been wrought with sadness.

The sadness of my grandmothers’ passing came as a great surprise to me and came right in the middle of a large project I am working on. I don’t want to reveal too much yet, but I have some exciting things going on relating to the quilting world. These exciting things are occupying a large portion of my time right now, so I have not been able to sew as much as I would like.

I will keep you updated as things progress, but for now I hope you can understand my quietness and I hope you will be here to share in my exciting news when I return.

Happy Quilting!
Rachel

Posted on 2 Comments

My Mother’s Quilt

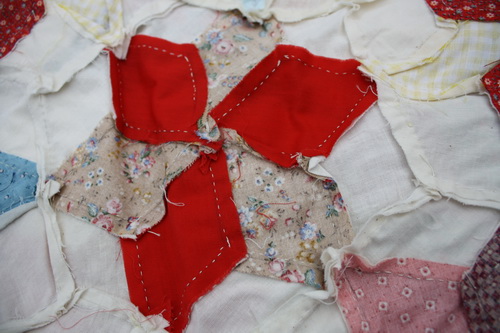
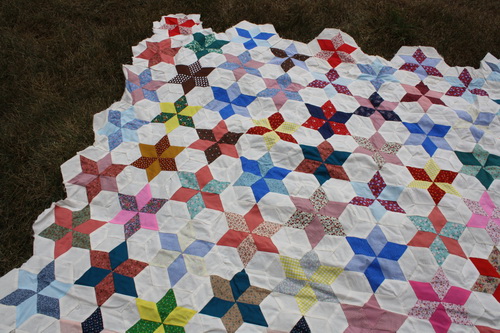
My grandmother started my mother’s quilt in the early 90’s I believe. She hand pieced the entire thing. Here is a shot of the hand piecing from the back of the quilt.

IMG_0421

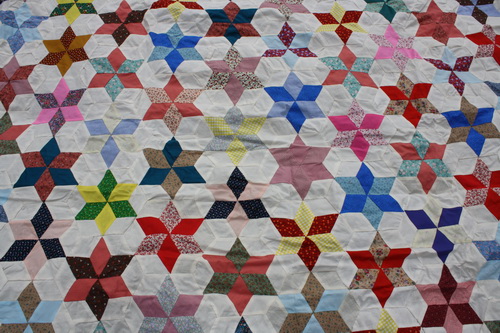
The whole quilt is made up of individual diamonds, which end up looking like stars because of the color arrangement.

IMG_0427

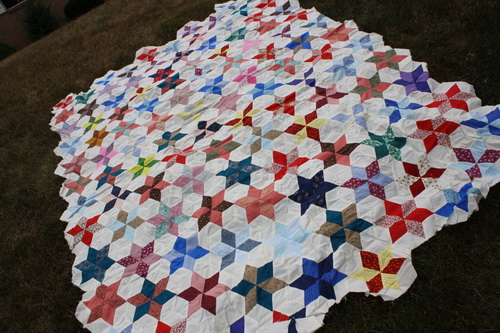
The whole quilt is not very big, I wish I could make it bigger, but I don’t think I have enough fabric left over. It will have to be more like a twin size quilt, though a queen would fit my mom’s bed better.

IMG_0423

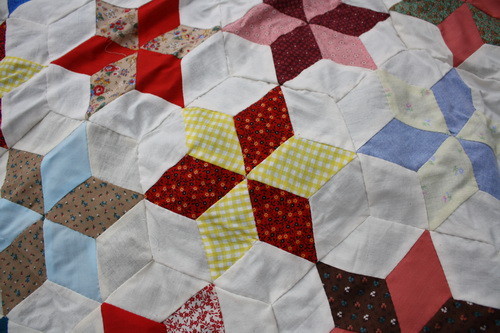
The fabrics in this quilt are obviously quite old, but there is one in particular that makes me smile. The yellow check below is the same fabric my grandma used in my baby blanket. I dragged my quilt around with me until it literally fell to pieces, so it makes me smile that a piece of it lives on in this quilt.

IMG_0428

One of the issues I am going to have in finishing this quilt will be the edges. I am not sure I can leave them as is, as putting a binding on that will be very hard for me, but I would also hate to cut the quilt to make the edges straight. I may end up appliqueing the edges onto a straight binding. We shall see.

IMG_0425

I will machine quilt this for my mom once I am better at using my machine. That means I probably won’t finish it for at least a year! I want it to be finished perfectly for my mom.

Happy Quilting!
Rachel

Posted on

Bug Jar Quilt

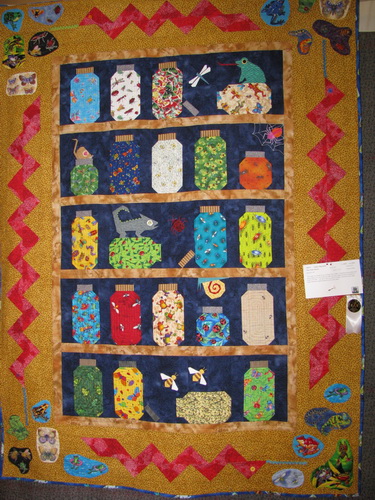
During the big ‘Fall into Fall’ giveaway, I had a visitor comment on one of my other posts. The visitor was Mary of Needled Mom. She left me a comment on my Quilt Show Part 2 post saying that she had previously made the ‘Bug Jar Quilt’ that I mentioned wanting to make. Here is the quilt from the quilt show I went to see:

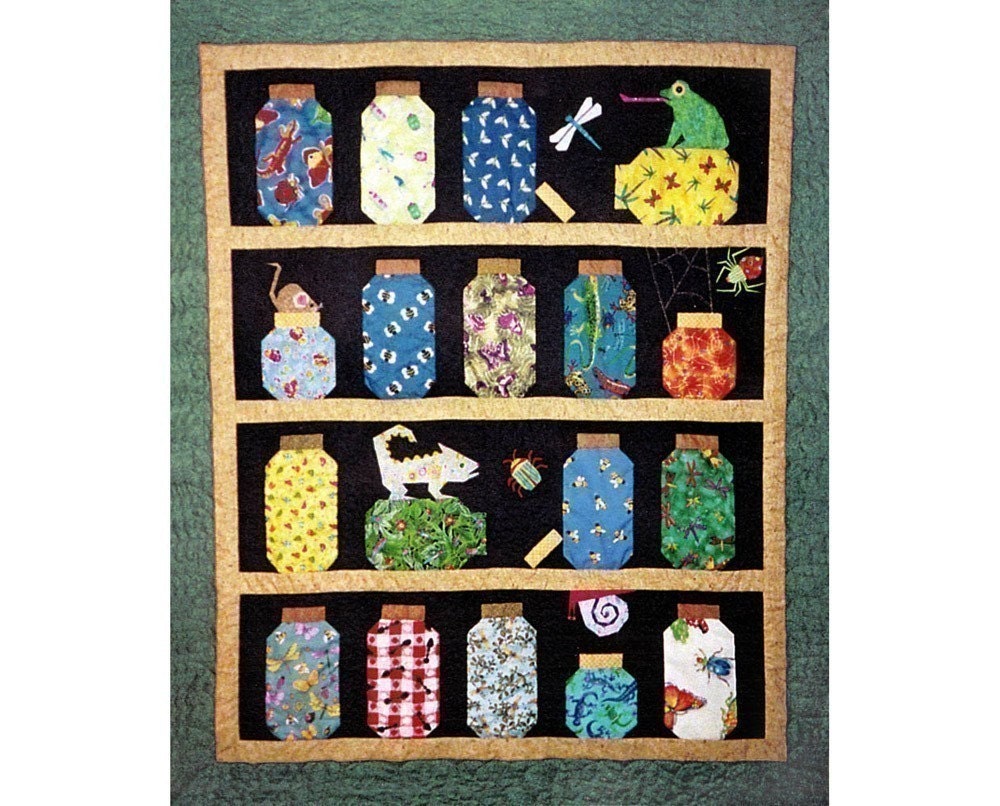
My own thoughts on this one were “Love this quilt. It is a commercial pattern and I will make it someday. I just have to get the pattern … and the fabrics … and well … the time. But someday I will!”, so when Mary said she had made it before of course I asked her where she got the pattern as I had been looking for it for some time. Mary had made the quilt many years ago for her grandson, but she took a peek through her stash to see if she still had a copy of the pattern. Unfortunately she did not, but she did find an Etsy seller for me that did have a pdf copy of the pattern. Click on the pic below to be taken to the pattern for sale.

I had never heard of the seller, bcheri, before. I am hesitant to buy pdf’s of patterns as sometimes people just scan in their copy, which is obviously against copyright laws. The picture of the pattern didn’t have the pattern makers name on it, so I just wasn’t sure if the Etsy seller was the pattern maker, but I decided to take a chance on it anyway. The pattern is not a reproduction at all. The pdf is not scanned, it is an original pdf pattern. From the pdf itself I was able to determine that, Beth Maddocks of Piece By Number, is the pattern maker and the owner of the Etsy store I bought it from. That came with great relief as I could feel very comfortable using the pattern now. Beth had great service, she had the pattern to me within 24 hours of payment, and she followed up to be sure the pattern didn’t end up in my spam folder. I would highly recommend her as an Etsy seller.

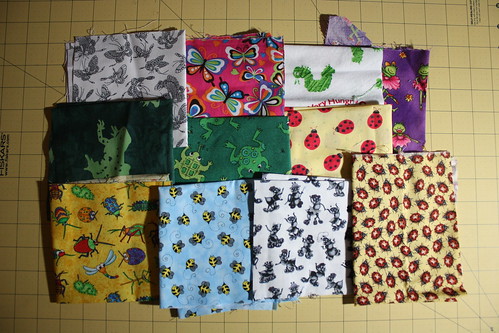
I let Mary know that I had picked up the pattern, and thanked her for helping me find it. She then asked for my address as she wanted to send me a few buggy fabrics she had found in her stash. A few weeks later these pretties showed up on my doorstep:

IMG_0909

Awesome right?! This gives me such a head start on collecting buggy fabrics!! It’s not always easy to find a good variety in a store, so I may do a trade for more buggy fabrics as well, but Mary’s generosity certainly got me started!

I am excited to get started collecting fabrics for this quilt, and even more excited that I may actually get this one done someday. Writing this blog has just been a fun way to share my projects with the world (as my husband only pretends to care), and meeting people like Mary is the icing on the cake!

Happy Quilting!
Rachel
Posted on 2 Comments

Honey Bun Bargello

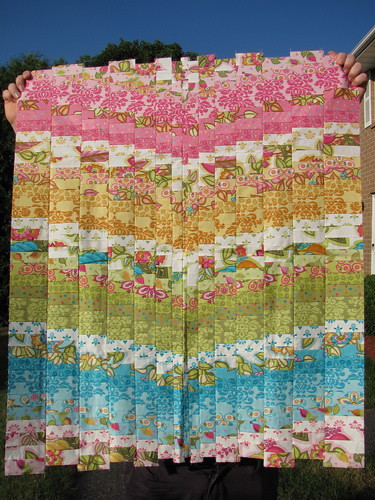
After I finished putting together the top for my Funky Chicken quilt, I had a few blocks left over. I offered these blocks up to a few of the other members of the swap so they could have some extras to play with when making their quilts. In exchange I just asked that they send me a few scraps since I love to play with other people’s scraps for my quilts. Well one girl was nice enough to send me a whole honey bun! A honey bun is a roll of about 40, 1 1/2 inch strips. All the strips come from one coordinating line of fabric. I had never worked with a honey bun before, so I was excited to give it a try. After thinking about a pattern, I finally settled on a Bargello pattern. Here is the top I made.

IMG_0076

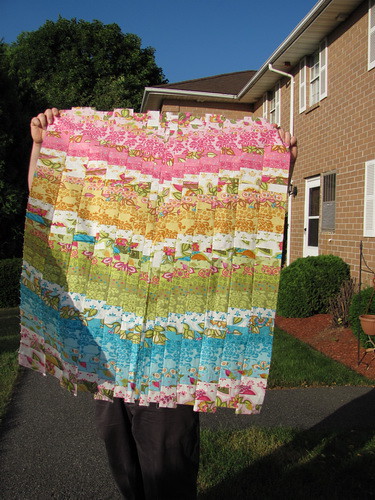
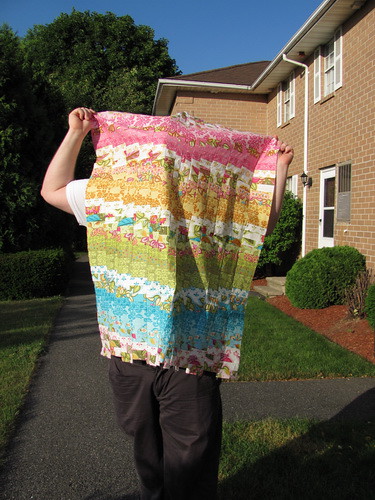
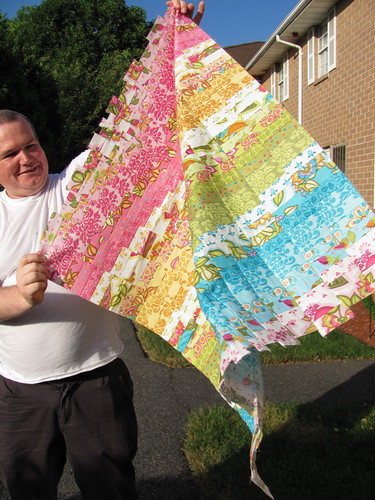
I had Kris help me take that picture, of course it was windy out when we took the pics, so getting this just right took a few shots. Just for fun, here are a few outtakes.

IMG_0070

IMG_0071

IMG_0062

Happy Quilting!
Rachel
Posted on 4 Comments

Pure Layer Cake

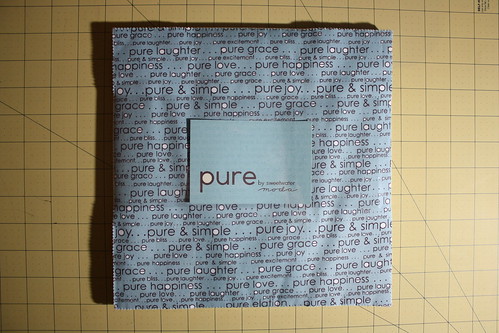
Recently I won a $25 gift card to the Fat Quarter Shop. I decided to put this to good use to pick up a layer cake of the ‘Pure’ line by Sweetwater for Moda. I have been in love with this line since before it came out when FQS just had previews of it up. This was a great chance to pick it up.

IMG_0911

I enjoy shopping at FQS, they always have quick service and their stuff is well packaged. While I was waiting for my layer cake to arrive, I perused the web for some patterns that would work with a layer cake. I wanted to try and make a quilt with only this layer cake, no extra fabric added. I knew it would be a challenge, but I did find a wonderful pattern on the Moda Bake Shop blog. This is a fun blog where all sorts of people post tutorials for making quilts, many of which are using Moda’s pre-cuts, which is wonderful. I ended up picking the ‘Boxed in Quilt’ pattern by KarrieLyne of Freckled Whimsy. (click the picture to be taken to the pattern)

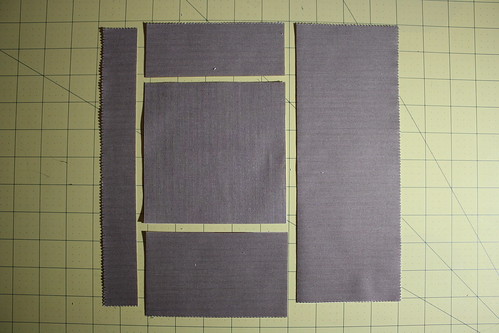
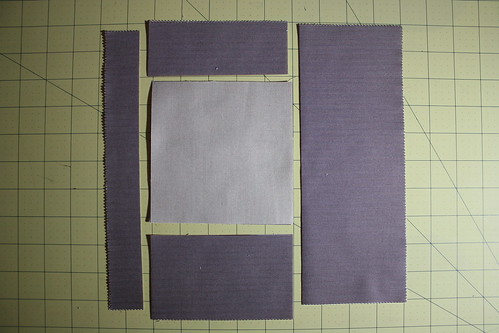
She wrote the pattern to go with the Lollipop Layer cake, which has a few solids in it, but she mentioned that you could also do a layer cake with no solids, and just move the centers around. This is what I decided to do this with the ‘Pure’ layer cake. When the layer cake arrived, I paired up 40 of the squares, trying to have a decent contrast between the pairs.

IMG_0912

Each of these pairs will have one fabric for the outside and one for the inside. Then it will be reversed. This allows each pair will make 2 blocks. The layout will be 8×5, and with the blocks finishing at 8.5 inches, the quilt will be 42.5×68. If I add a border on, I think this will make a nice sized quilt.

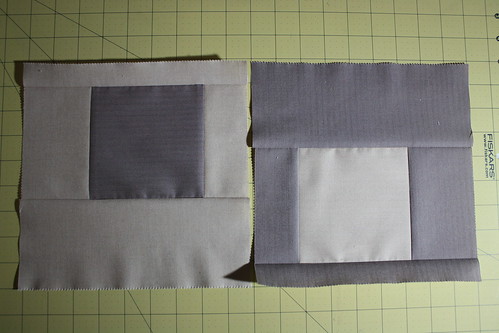
I had 2 extra squares because the layer cake came with 42 squares and I only needed 40, so I did a quick test of the blocks. You can see how the middles get changed and the two blocks end up being a reverse of each other.

IMG_0914

IMG_0916

IMG_0918

This was my first time working with a layer cake. I am not quite sure how I like it. The pinking is a bit annoying, though I know without it; these blocks would be a stringy mess. I haven’t actually made more blocks yet, but by the time I am done this quilt, I think I will be very acquainted with working with a layer cake. My son Kolby has already laid claim to this quilt, so I better get cracking on it!

Happy Quilting!
Rachel
Posted on 2 Comments

Quilty Inspiration

This week’s quilty inspiration comes from Jacquie at Tallgrass Prairie Studio.

This mini quilt really appealed to me because it is so different from the norm. Jacquie titled this “Three Sheets to the Wind”, which I find so funny! I am drawn to quilts that are not your normal block design, which is why I have been looking at applique quilts more and more. I would love to make something like this little mini someday.

Happy Quilting!
Rachel

Posted on 1 Comment

Dear Jane Blocks A-3 and A-12

I have two more blocks done for my Dear Jane quilt. I actually made A-3 some time ago. I like it, but it isn’t my best job in applique. Done is done though!

A-3
Dear Jane A-3

A-12 was a pretty complicated block to make. It is labeled as an ‘intermediate’ block. The pieces on this are tiny. Some of those triangles finished at just barely over a 1/4 of an inch!

One thing I learned on this block is that making two of each block is a wonderful thing and a very crazy thing. The purple block was made first and probably took me a good two hours to make. After I finished I really really didn’t want to make another! I waited until the next day and thought on some of the mistakes I made, then started in on the blue and orange one. You can’t really tell from the front, but the seams are way better on the second one.

A-12
IMG_0898

With every Dear Jane block I make, I learn something new about sewing and precision quilting. I also learn to let the little imperfections go because sometimes finished is way better than perfect.

Happy Quilting!
Rachel

Posted on 1 Comment

Halloween Goodie Bags

Leading up to Halloween a lot of the quilting blogs I follow had some really fun Halloweenish projects. One project that caught my eye was from Wendy at Why Knot?. She made a bunch of little totes to hold treats for her trick or treaters:

Though I really loved the idea, I knew I would never make that many in time, so I decided to just make a couple for two little girls that my son is close friends with.

The pattern comes from The Happy Zombie. She had it published at better Homes & Garden, so the pattern can now be found on their site:

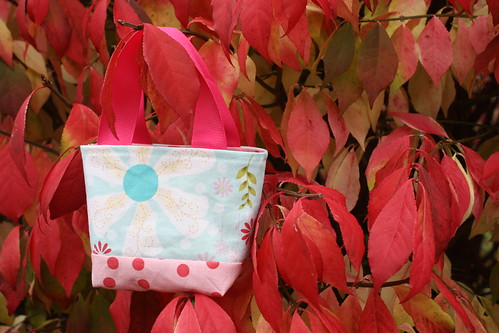
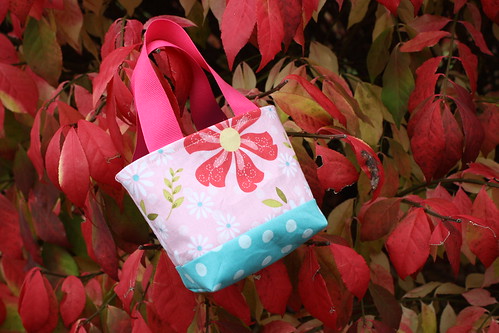
It is a very easy pattern. You end up with 4 little bags out of just 2 fat quarters. I only wanted to make 2 bags, so I just adjusted my cutting accordingly, but I found it very quick to get these together. I used some of my leftover Sweet Divinty fabric that I had won a while back. The only thing I did different than the pattern, was I did a little topstitch at the top of the bag. It’s not really necessary, but I think it gives it a nice finished look. here are my two finished bags:

IMG_0927

IMG_0924

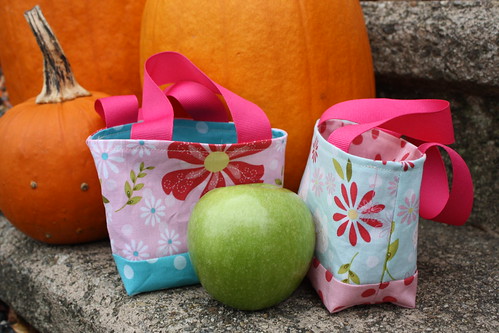
And to give you an idea of their size, here they are with a green apple:

IMG_0928

I happened to have some pink ribbon around the house, but you could also make the handles from matching fabric. My husband filled the bags up with little treats for the girls, and when they came by the house to trick or treat they got this special little package. I tried to take pictures of them full, but only discovered after they were given away that my card wasn’t actually in the camera at the time!

I am totally keeping this pattern in my arsenal, I can think of so many great uses for it.

Happy Quilting!
Rachel