Posted on 2 Comments

Quilty Inspiration

This week’s inspiration comes from Bonnie at Quiltville.

If you have never visited Bonnie’s website, be sure that you do. She has some of the best ideas for making quilts with scraps. I have a thing for optical illusion quilts. I especially enjoy it when, by placement of color and design, the quilt looks way more complicated than it really is. That is why this particular quilt appealed to me. It looks like it is made up of quarter square triangle blocks set on point, but really the blocks are 2 half square triangles set in rows. If you click on the picture there, you will find instructions to make this quilt. It really is super simple, but creates a really eye catching design.

Happy Quilting!
Rachel

Posted on 1 Comment

Basic Grey Origins

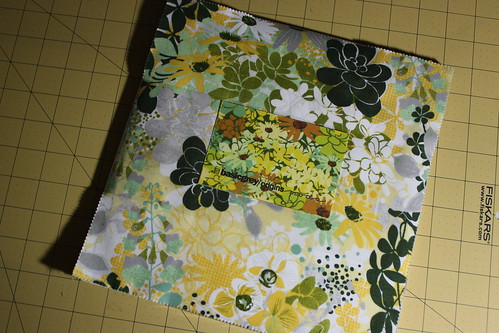
When I did more paper scrapbooking, Basic Grey was always my favorite paper. I love the distressed, worn in look that Basic Grey is famous for. Not too long ago I discovered that Basic Grey is now turning their designs into fabric. Wonderfully pretty, distressed fabric. I have not had the chance to actually try any of their fabrics yet, so I am not sure if I will love the distressed look in a quilt, but I recently picked this up.

IMG_0904

It’s a layer cake of Basic Grey’s line, Orgins. I am not quite sure what I will be doing with it yet, but right now I am just petting it. I have never owned a layer cake before and it just looks so darn pretty!

Any suggestions for a layer cake friendly quilt pattern? I am thinking of one called ‘Ashcombe’, but not sure yet.

Happy Quilting!
Rachel

Posted on 3 Comments

Halloween Napkins

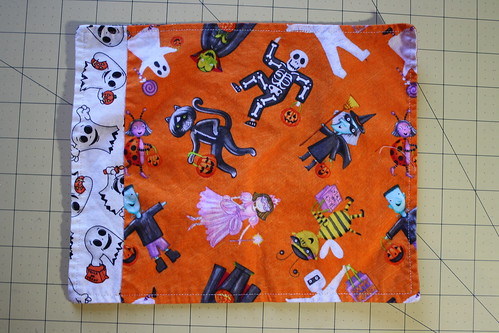
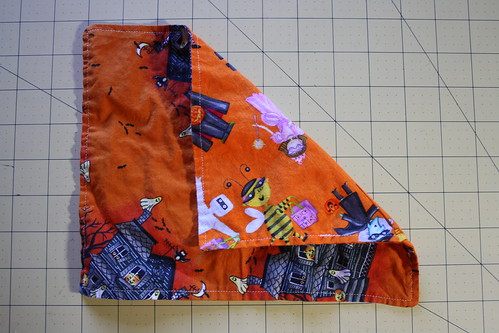
After the ladies in the Bee Creative swap helped me make my Halloween quilt, I had a lot of fabric leftover. There wasn’t really enough to make another whole quilt, but I wanted to find something fun to do with it. I have had a few napkin tutorials saved in my “someday” files for some time. I decided to finally give it a try with my Halloween fabric.

IMG_0892

The tutorial I chose to use came from Film in the Fridge. She had a great tutorial for making a napkin with rick rack around the edge.

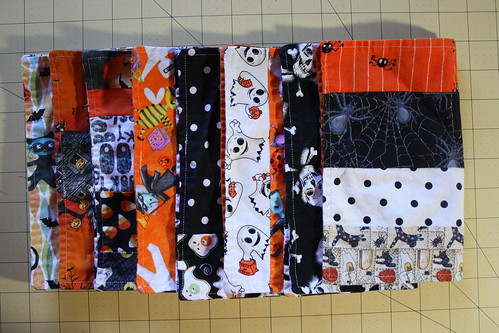
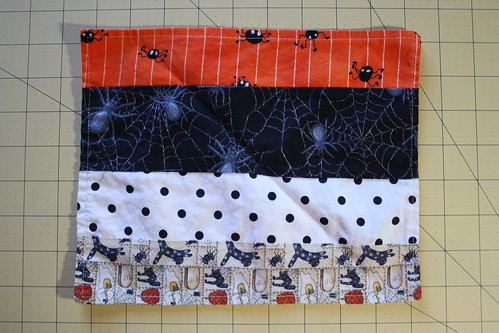
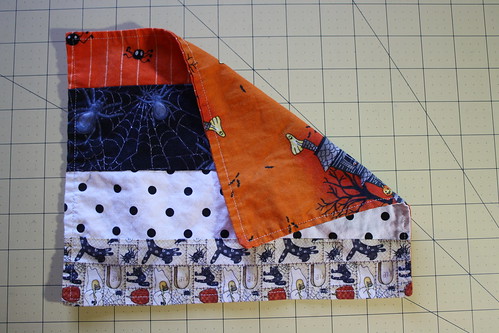
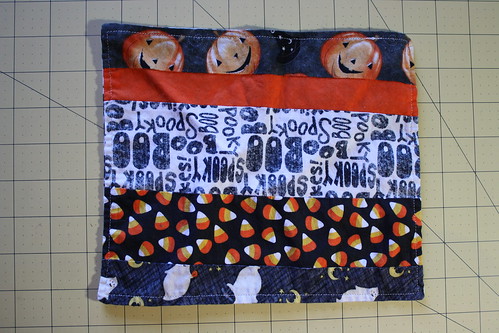
I chose not to do the rick rack, but the basic instructions for the napkin are the best I could find. I didn’t use her sizes, I basically cut a 1/4 yard piece of fabric in half to get my two pieces. I also pieced some extra strips I had to make them a bit more interesting. the basic name of the napkin making game was to use up scraps.

Here are a few individual shots of my napkins:

IMG_0893

IMG_0894

IMG_0895

IMG_0896

IMG_0897

Happy Quilting!
Rachel

Posted on 2 Comments

Baby Blanket

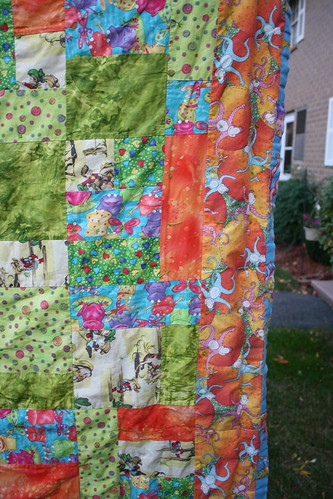
This is my son’s baby blanket.

IMG_0742

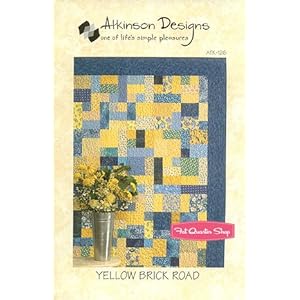
I made this 7 years ago when my son was born. Ihonestly knew very little (make that, next to nothing) about quilting at the time. I had only made a few other quilts before this one, so I decided to use a pattern that was simple to make and that I had used before. The pattern is called ‘Yellow Brick Road’. I would highly recommend it for beginners.

At the time, I didn’t know how to do a regular binding so I wrapped the backing to the front on all my quilts.

IMG_0743

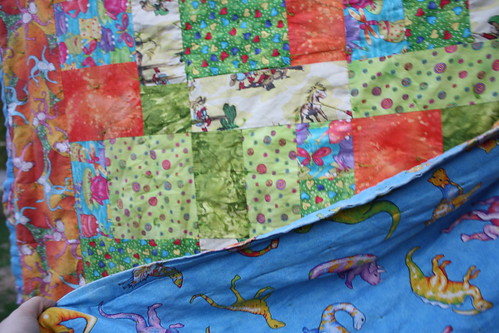
The backing was a cute dinosaur fabric that I had, and I still have pieces of that hanging around my house.

IMG_0744

Here’s the part of the story that I am completely ashamed of though. This was not the first blanket I made. I put together another quilt, one that had much cuter fabrics than this one. I had the top finished, I basted the backing, batting, and top and then attempted to quilt it on my domestic machine. The thing was, I didn’t have a walking foot, didn’t know I needed one, so the quilt ended up all bunchy and weird looking because it wasn’t feeding through right. No big deal right? Just unpick and tie it like I had all my other quilts right? Well stupid, stupid me didn’t realize that unpicking was even an option. I threw the whole thing away. Yes, you heard me right. Only because my machine sewing was bad, I chucked this great quilt in the trash. I did not even remember this story until I took pictures of this quilt to share with all of you and the horror came flooding back to me. I absolutely cannot believe I was so stupid. I can only hope that someone way smarter than me rescued the quilt from the trash and unpicked it, like I should have, and made some child happy with it.

Even though I detest frogging, I certainly would have done it instead of wasting so much fabric and batting. I do not even have pictures of the first quilt, but I do remember that the fabrics were more boyish. I wanted the quilt done before he was born, so the I just grabbed whatever fabrics I had on hand. I can absolutely promise you I have never thrown away another quilt. My son loves this quilt, though he is not attached to it like a lot of children are to their blankies. I had a blankie that was basically rags by the time I was his age. He doesn’t ‘need’ this to sleep, but he will sleep with it. In fact he’ll sleep with it and 10 other quilts. He doesn’t have one favorite blanket, they are all his favorites.

Happy Quilting!
Rachel

Posted on 1 Comment

Taco Salad Recipe

How about something different today? I wanted to share a family favorite recipe with all of you. A while back I found a recipe for Taco Salad online. I was looking for something different from what I usually did for Taco Salad, which was basically tacos with more lettuce … in a bowl. I tried this recipe and it was a hit from the first go round.

If you want to see the original recipe, go here.

I have made a few adjustments to the recipe to suit my family’s tastes and just from making it a few times. Feel free to take my changes and change them again! I’d love to hear if you try this recipe and what you did to change it up, or if you kept it the same.

______________________________________________________________________________________

Taco Salad

1 1/2 lb. ground round
1 envelope taco mix
1 teaspoon cumin
1 head lettuce, torn into bite size pieces
1 green pepper, chopped
1 yellow pepper, chopped
1 red pepper, choped
1 can niblets whole corn, drained
1 can (15 oz.) red kidney beans, washed and drained
1 bag nacho cheese Doritos
Sour cream
Shredded Cheese

Dressing
1 c. salad oil
1/3 c. ketchup
1/2 c. sugar
1/4 c. vinegar

Brown and drain hambuger, add water and taco mix according to the instructions on the taco mix. Set aside once finished.

In large bowl combine letuce, green, yellow, and red peppers, niblet corn, and kidney beans. Toss throughly.

In seperate bowl combine the ingredients for the Dressing, whisk well.

Add taco meat, dressing (we actually only add about 2/3 of the dressing, your tastes may vary), and cumin to bowl with the salad ingredients. Toss well.

To serve: Crush Doritos into individual bowls, add salad and top with sour cream and shredded cheese.

______________________________________________________________________________________

I have found that by not adding the doritos with the salad as the original recipe suggests, the chips are crunchy while you are eating it. I would imagine all mixed it they would get soggy quick. I also add more cumin right into my bowl as it seems the taco flavor diminshes a bit when everything is added together.

I have to say that the Taco Salad keeps very well in the fridge. The lettuce still has a crunch to it for the next few days. In fact we almost prefer this recipe as a leftover because the flavors seem to infuse even more.

Happy Eating!
Rachel

Posted on 11 Comments

My Christmas Quilt

I thought it might be fun to participate in Amy’s Blogger’s Quilt Festival today.

This is Amy’s fourth Quilt Fesitval, and I have always enjoyed looking at all the inspiration. This year I have a blog, so why not participate!? If you click on the banner above, you will be taken to the post about how the quilt festival works and also get to see all the other blogs that are participating and sharing a quilt that they love.

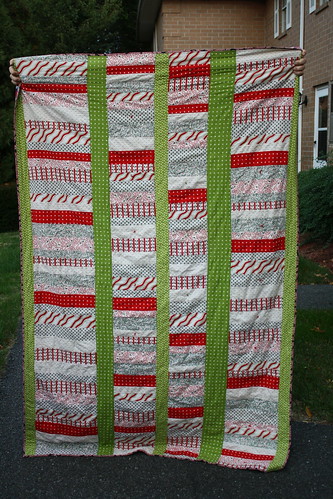
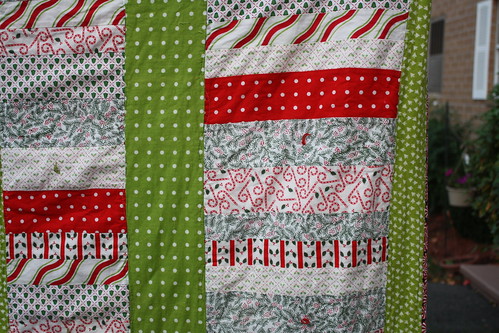
So without furhter ado, my entry is a Christmas quilt I have. This quilt was finished about two years ago. I was seeing Christmas quilts around the web, and I felt inspired to make something with a little bit of red and green. I went out and bought the fabrics and put together the whole quilt, start to finish, in about two weeks.

IMG_0746

The pattern I used is called ‘Stacked Coins’. It’s a really simple pattern where you sew short strips of fabric together, one on top of the other. I used a peppermint fabric to bind the quilt (kind of hard to see here, sorry).

IMG_0747

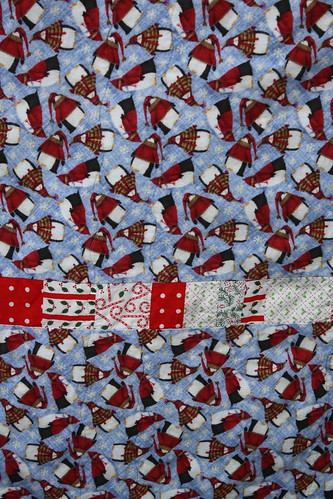
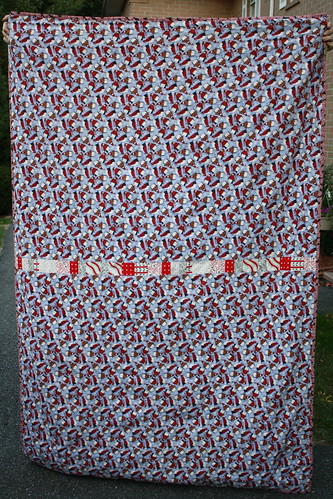
I used a penguin flannel for the back. The fabric I had ended up being just a tad short, so I pieced a strip to go in the middle to make everything fit right.

IMG_0749

IMG_0748

My son loves this quilt, and I sometimes have to remind him that it’s not really his. Though if he were to press the point, he would probably get it anyway. My son has an obsession with blankets, the more the merrier for him. He can often be seen sleeping under up to 10 blankets and quilts at night! I’m not complaining though, at least I know the quilts I make are truly loved.

Happy Quilting!
Rachel

Posted on 1 Comment

Quilty Inspiration

This week’s quilty inspiration is from Ashley of Film in the fridge.

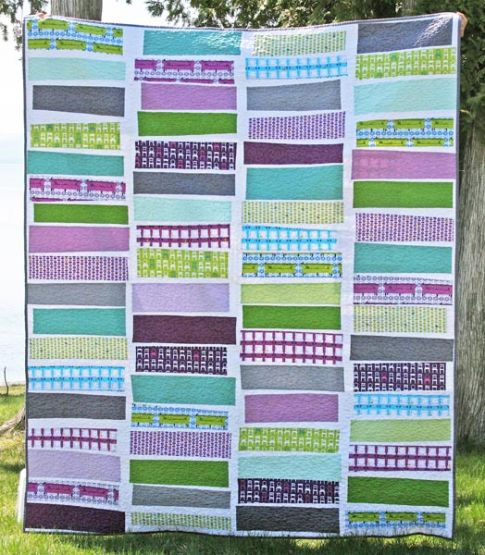
If you click on the picture above, you will be brought to the free pattern for this quilt from Robert Kaufman. It was designed by Ashley for them. I love everything about this pattern, it is pretty simple to make, but has a great visual impact. I love that it is slightly wonky, and the blocks of patterned fabrics would be a great way to show off any fabric line. I have a few quilts planned for this pattern.

Happy Quilting!
Rachel

Posted on 5 Comments

I’m a Winner!

I usually enter quite a few blog giveaways, especially if they involve pretty fabrics. So far I have not been very lucky in becoming a winner of any of these. As you might guess by the title, I finally did win something! I not only won my very first giveaway about a month ago, but a week or two later I won my second, and then just yesterday I won my third. I am excited beyond words!

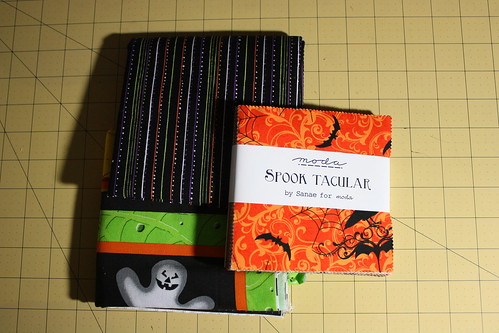
My first giveaway that I won was from Wendy of ‘Why Knot?‘. Look at the lovely, yumminess I won!

IMG_0907

It is a Halloween charm pack, a Halloween panel, and a little yardage. If you weren’t already aware, I LOVE Halloween, so I think this fabric just knew it would find a good home with me. I don’t have any plans for this yet, but I cannot wait to dive in!

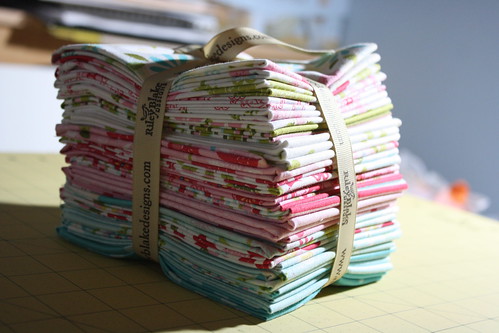
My second giveaway was won over at Stash Manicure. I won this stunning fat quarter pack from the Sweet Divinity Line by Riley Blake.

IMG_0902

There was a bit of a mix up and there ended up being two winners announced for one prize, but Madame Samm was beyond sweet and had a chat with the giveaway sponsor, Riley Blake, and she decided to award the prize to both of us! Riley Blake only asked that I make a project with my winnings soon so she can use the picture for promotion. I think I can handle that.

I have never owned a fat quarter pack before, so before I cut into this one, I have been admiring it in all it’s packaged prettiness. I have an idea rolling around in my head for what I will make with this, and hopefully I will have something to show you soon!

My third giveaway was won at Crafty Musings. She was having a giveaway to celebrate her 501st post (I haven’t even come close to that!), and I entered on a whim and I was the big winner. The prize was a $25.00 gift certificate to the Fat Quarter Shop. I have a few things on my wish list, so I guess it’s time to go shopping.

So there you have it, I am a winner thrice over, and it’s not only my mom that says so!

Happy Quilting!
Rachel

Posted on 2 Comments

Baby Girl Quilt

I have had very rare opportunities to make a quilt for a girl thus far. I only have a son, my sister only has a son, and all my friends have boys. So it came with great joy to hear that my sister would be having a baby girl in December. I cannot wait to make all kinds of girly things!! First up was a baby quilt.

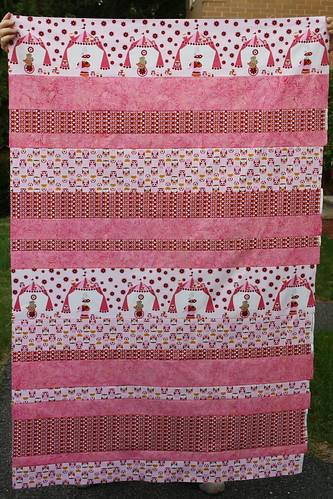
IMG_0726

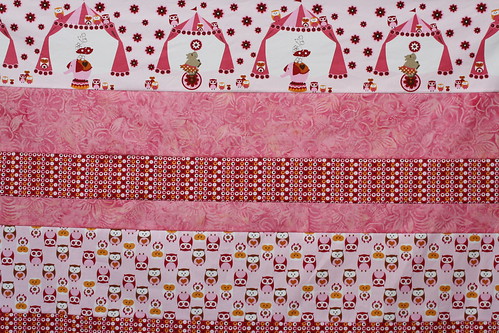
I hadn’t trimmed one side for this pic, but all I did was cut random strips of patterned fabric from one line and interspersed it with a pretty pink batik. Here’s a closer shot of the fabrics I used.

IMG_0728

It was very simple to make, but I think it came out so adorable!! This is my very first all pink quilt. Let’s hope the baby doesn’t surprise us and come out a boy though! Here’s the fabric I will be using for the back:

IMG_0736

I can’t wait to get this one quilted up. Next up for the baby girl, a tutu!

Happy Quilting!
Rachel

Posted on

Quilty Inspiration

This week’s inspiration is from A Quilt is Nice.

I really love this design. It is very simple and can be seen all over the web, but there is something to be said about a simple design. It leaves you a lot of room to make the quilt shine just from the choices in fabric more so than the complicated piecing. This particular version appealed to me because the boxes are just slightly wonky. I love a little wonkiness in my quilts because it means I don’t have to worry so much about lining everything up just so. I have never actually made a boxy quilt, but it is on my to-do list once I find the perfect fabrics for it.

Happy Quilting!
Rachel

Posted on 2 Comments

Dear Jane Blocks B-13 and C-12

It has been a while since I worked on some blocks for my Dear Jane quilt. This quilt will be an ongoing project for quite a while because I just have so many other quilts I want to do too. I am okay with that though.

Here are the two blocks I finished recently:

B-13
IMG_0885

C-12
IMG_0887

These two were fairly easy to make. I just used the rotary cutting instructions from the Dear Jane software. B-13 was a snap to put together, but while piecing C-12 I discovered something about my sewing machine. My machine was not sewing a true 1/4 inch seam! I am not sure why it was off, but it was easy to tell from the test block I made for Rainbow Jane (in green in the picture), that when my pieces were ironed open, they were too big. I tried squaring up, but once that block is put in the quilt, my pieces will be way off. So before going on to the piece for my blue and orange Jane, I used a ruler to mark the proper 1/4 inch from my needle and put down blue painter’s tape as a guide. The second block went off without a hitch and turned out nearly perfect in my humble opinion!

I knew I would learn a lot from Jane, but finally marking my true 1/4 inch line will make all my quilts better! I guess when you are sewing pieces that will end up just a half inch wide in the end, precision is key. This block taught me A LOT about precision, something I never could really do before.

Happy Quilting!
Rachel

Posted on 5 Comments

Giveaway Winner & My Stripey Quilt

Thanks to everyone for all the wonderful comments on my first giveaway. The captions everyone came up with were simply awesome. I had a blast looking through them, but had such a hard time narrowing down my favorites.

Here are my top 10 favorite captions (In no particular order):
______________________________________________________________

Kitty on a Hot Pinned Roof from Paulette
______________________________________________________________

Yuck! I guess she must have said “quilt basting” not “quilt tasting!” from Riel
______________________________________________________________

Ancient Chinese Kitty Toture from Karie
______________________________________________________________

CAN YOU HAZ ANY MOAR PINZ?!?!? from Brittainy
______________________________________________________________

Hmmm…now, where is the spot that will maximize destruction? WOMAN, KNOW WHO YOU’RE DEALING WITH! from Dot
______________________________________________________________

Ummmm….no bologna….no cheese. Quilt sandwich? I think not…. from Kim
______________________________________________________________

But I thought the song said Follow the YELLOW brick road?!?!? from Kristin
______________________________________________________________

Ciao, you must place the remaining safety pins in their proper position. No lifelines and you must complete this level. Remember you have A MINUTE TO WIN IT! Ciao, your time starts now! from Nancy Sue Phillips
______________________________________________________________

Here we have the native feline stalking the ever present pin bug. Watch now as it slowly stalks its prey. Those pin bugs can be quite a handful for the felines. from Mel
______________________________________________________________

If only I could train Ciao to bind as well as he pins from Jackie W
______________________________________________________________

All the entries were so creative!! I am blown away with what you guys were able to come up with, but I could only choose one as my winner. The reason I chose the winner is because we are a joking family. We are always teasing each other and joking around. A few years ago my husband taught my son to call me ‘woman’. You have not lived a day until you hear your 4 year old say “Woman make me dinner!” LOL Of course this was all meant in fun from my husband, and I think it is hilarious. (Though we have had to have the talk about when it is appropriate to call me this, it’s a little embarassing when he says it in the middle of Wal-Mart!! Oh and that he should NEVER call any other woman this as some may not think it is funny at all.) So with that reason, the winning caption came from Dot:

IMG_0666
Hmmm…now, where is the spot that will maximize destruction? WOMAN, KNOW WHO YOU’RE DEALING WITH!

I also used the random generator to come up with the second winner. All comments left counted for the drawing, minus any duplicate posts. There were 309 comments left and the winner of the random drawing is Billie K from Billies Bee Blog with a post of:

Who’s been sleeping on my blanky???

Billie

Once again thanks to all my commenters and thanks to those who found my little blog interesting enough to add me to your follow list. I am truly honored and hope I can live up to it!! I will email the winners to get your snail mail address.

I thought I would show you a better picture of the quilt from my caption picture. I used the stripey quilt tutorial to make this one. I had initially made it to use at work since I was always cold, but then I switched jobs to an office where it wouldn’t be appropriate to have it, so now it just gets balled up and loved at our house (hence all the wrinkles!).
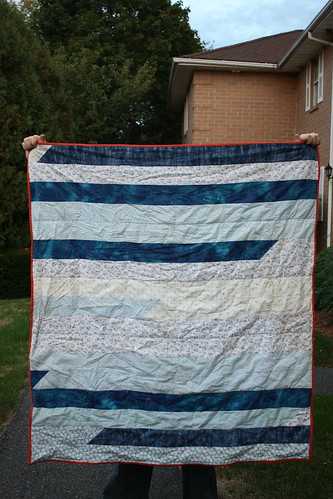
IMG_0737

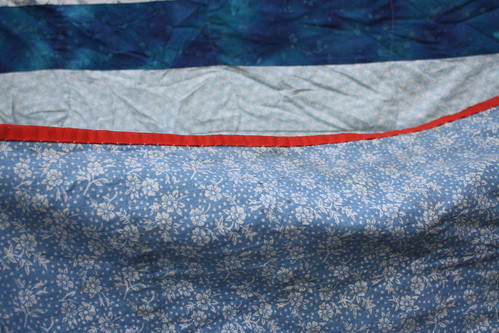
If you hang around my blog long enough, you will find that blue and orange is a common theme for me. This quilt was bound in a bright orange solid fabric.
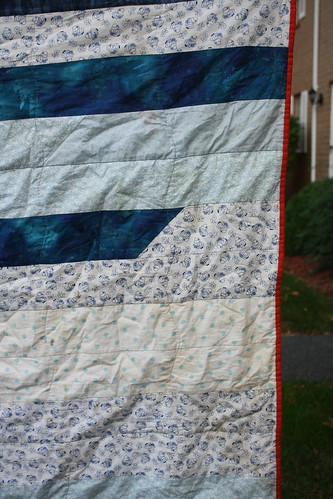
IMG_0738

The backing I used was just a big piece of fabric I had hanging around. It was kind of a stretchy material, so it wouldn’t have been suitable for using in a top.
IMG_0739

This quilt was quick and easy to make, and I do plan on making another quilt using this method again soon. If you haven’t seen this before, be sure to check out my quick tutorial.

Happy Quilting!
Rachel